Finishing up what I started
I like that in my last post on making Miguel Ases Style Jewelry I could show you the reality of how I mess up my projects just like everyone else and how to remove the stitches to fix it.
I didn't like that I couldn't show you how to finish the final picot round of the beaded component though - so that's what I'll do today.
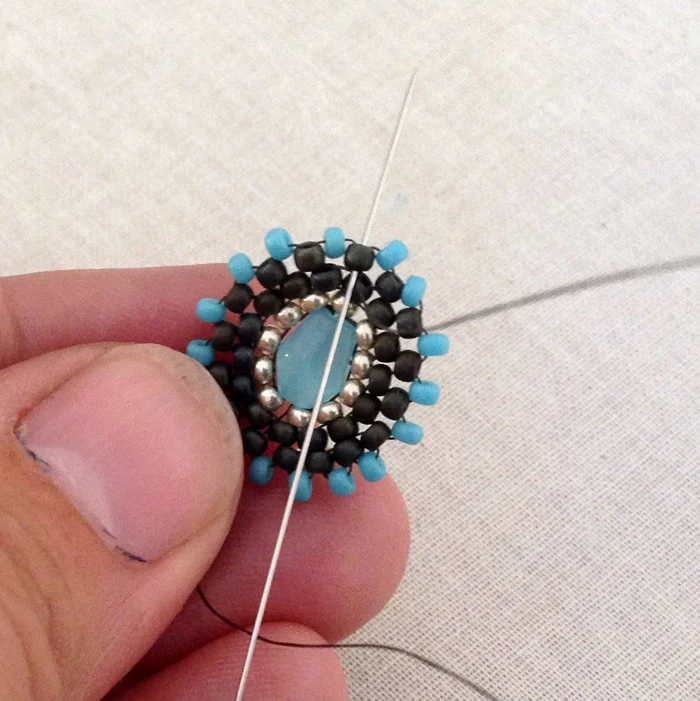
This is where I should have stopped yesterday, after I completed the second round of brick stitch around the focal bead.
Adding a picot edge to this component uses the same brick stitch thread path, but includes an extra bead for the edge. If you're not familiar with the term picot, I think it is mainly an embroidery term that refers to a decorative looped edge.
Instead of the usual 2 beads to start a round, I pick up three beads and stitch through the thread bridge from back to front as usual.
Then I stitch through the third bead and pull the thread tight to secure them. Try to center the picot bead (turquoise) between the other two beads vertically.
Why do I use three beads?
The first bead is the first bead of the 3rd round circling the focal, the second bead (turquoise) will be the picot edge on the 4th round, and the third bead is the second bead on the 3rd round. Wow - that sounds confusing!! Maybe the picture helps.
Subsequent stitches on this round will use only two beads. First pick up the picot edge bead (turquoise) and then the bead for the 3rd round.
Stitch through the thread bridge, up through the bead on the front and pull the thread tight.
Adjust the beads to keep the picot bead above and centered between the base beads.
Keep on adding 2 beads at a time, the picot bead and then the base bead, until you are almost done with the round.
Here is where it takes judgement to decide - is there room for one more base bead?? When in doubt, try it. If it's too squished to lay flat - remove it. (It is, and I did.)
The last stitch of the row uses only one bead - a picot bead. That is because you are joining two base beads together.
Add the bead and stitch through the first bead on the round from the top with the needle coming out the back of the project. Then stitch through the bridge underneath the bead you just stitched through.
If the bead is sitting between two bridges (which it often is), I will stitch through the one on the side of the gap that I need to close - closest to the last bead that I added. This will help me close the gap and even out the circle.
Stitch back up through the bead, pull tight and adjust all the beads on the round so they are as even as possible.
Ta-da!! Two matching components perfect for earrings!


Thank you so much your making these Miguel Ases style tutorials!! I can't wait for the others :) I've always loved his jewelry but I've never been able to afford even the smallest Miguel Ases earrings :(
ReplyDeleteI love them too! With the holidays coming up, I'll be making more of these and will try to post more tutorials real soon!
DeleteLisa is the basic beginning Miguel Ases style tutorial posted here? I'd love to learn this technique!
ReplyDeleteI can't find the post where you tell how to add two beads, as mentioned in your previous tutorial (the basic one). When I add two, do I put the needle back through the last one? It seems to look messy. Thank you for the extremely helpful tutorial. Just that one question. Thank you, Judy
ReplyDeleteAre you referring to adding 'two beads in one bridge'? No, you want to stitch them exactly the same, but because the circle is getting larger, you are going to need to add the first bead and it will be right where the bridge starts and the second bead will be stitched to the very end of the bridge. It's just a stitch spacing thing.
Delete