
How to Make Beaded Daisies on a String (Beginner Friendly)
A beaded daisy chain is a simple stitch that creates small flower shapes. In this version, the individual daily flowers are separated by a short space of seed beads. You can use this technique to make all sorts of jewelry, including:
- Bracelets
- Anklets
- Necklaces
- Eyeglass chains
- Bag charms
This is one of the easiest bead weaving stitches and a perfect first project for beginners of all ages.
What Is Daisy Chain Stitch?
Daisy chain stitch is a basic bead weaving technique that forms flower shapes by stitching back through beads to create a circular petal pattern around a center bead.
It teaches:
- Stitching direction
- Thread tension control
- Pattern repetition
It was one of my first bead stitches, and it is still one of the most satisfying. This is one of several different techniques to make daisy chains.
If you are interested in traditional Native American beadwork techniques, I originally re-learned this stitch from the book Indian Bead-Weaving Patterns by Horace R. Goodhue. It is comprehensive but not entirely beginner friendly. I discuss it more in my article on Native American daisy chain techniques.
Supplies for Beaded Daisy Chain
You can make daisy chain with many types of beads, but here is what I recommend for best results.
Recommended Daisy Chain Supplies
- Size 11/0 Czech seed beads
- Nymo Size D thread or Good Thread by John Bead Corp
- John James English beading needles
- Thread conditioner such as Thread Magic or beeswax
- Clam shell bead tips (optional) covers knots and gives a clean finish
- Lobster clasps or clasp of your choice

Before You Start Making Daisy Chains
If you're new to bead weaving, you may find these helpful:
Stitching a Daisy Chain

Step 1: Prepare Your Beading Thread
- Cut at least an arm’s length of thread.
- Stretch and condition the thread.
This project is a rare instance where I like to use a doubled thread. I find that Nymo size D gives a nice supple chain and using a double thread keeps the beads firmly in place without adding stiffness.
Step 2: Add a Stop Bead

A stop bead prevents your work from sliding off the thread.

To add a stop bead:
- Pick up a bead
- Stitch back through the bead.
- Position it 4–6 inches from the tail.
You will remove this bead later when adding a clasp.
Another option is to start with:
- Knotting the cord around the ring of a clasp
- A clam shell bead tip
Step 3: Add the Spacer Beads and First Half of the Petal Beads
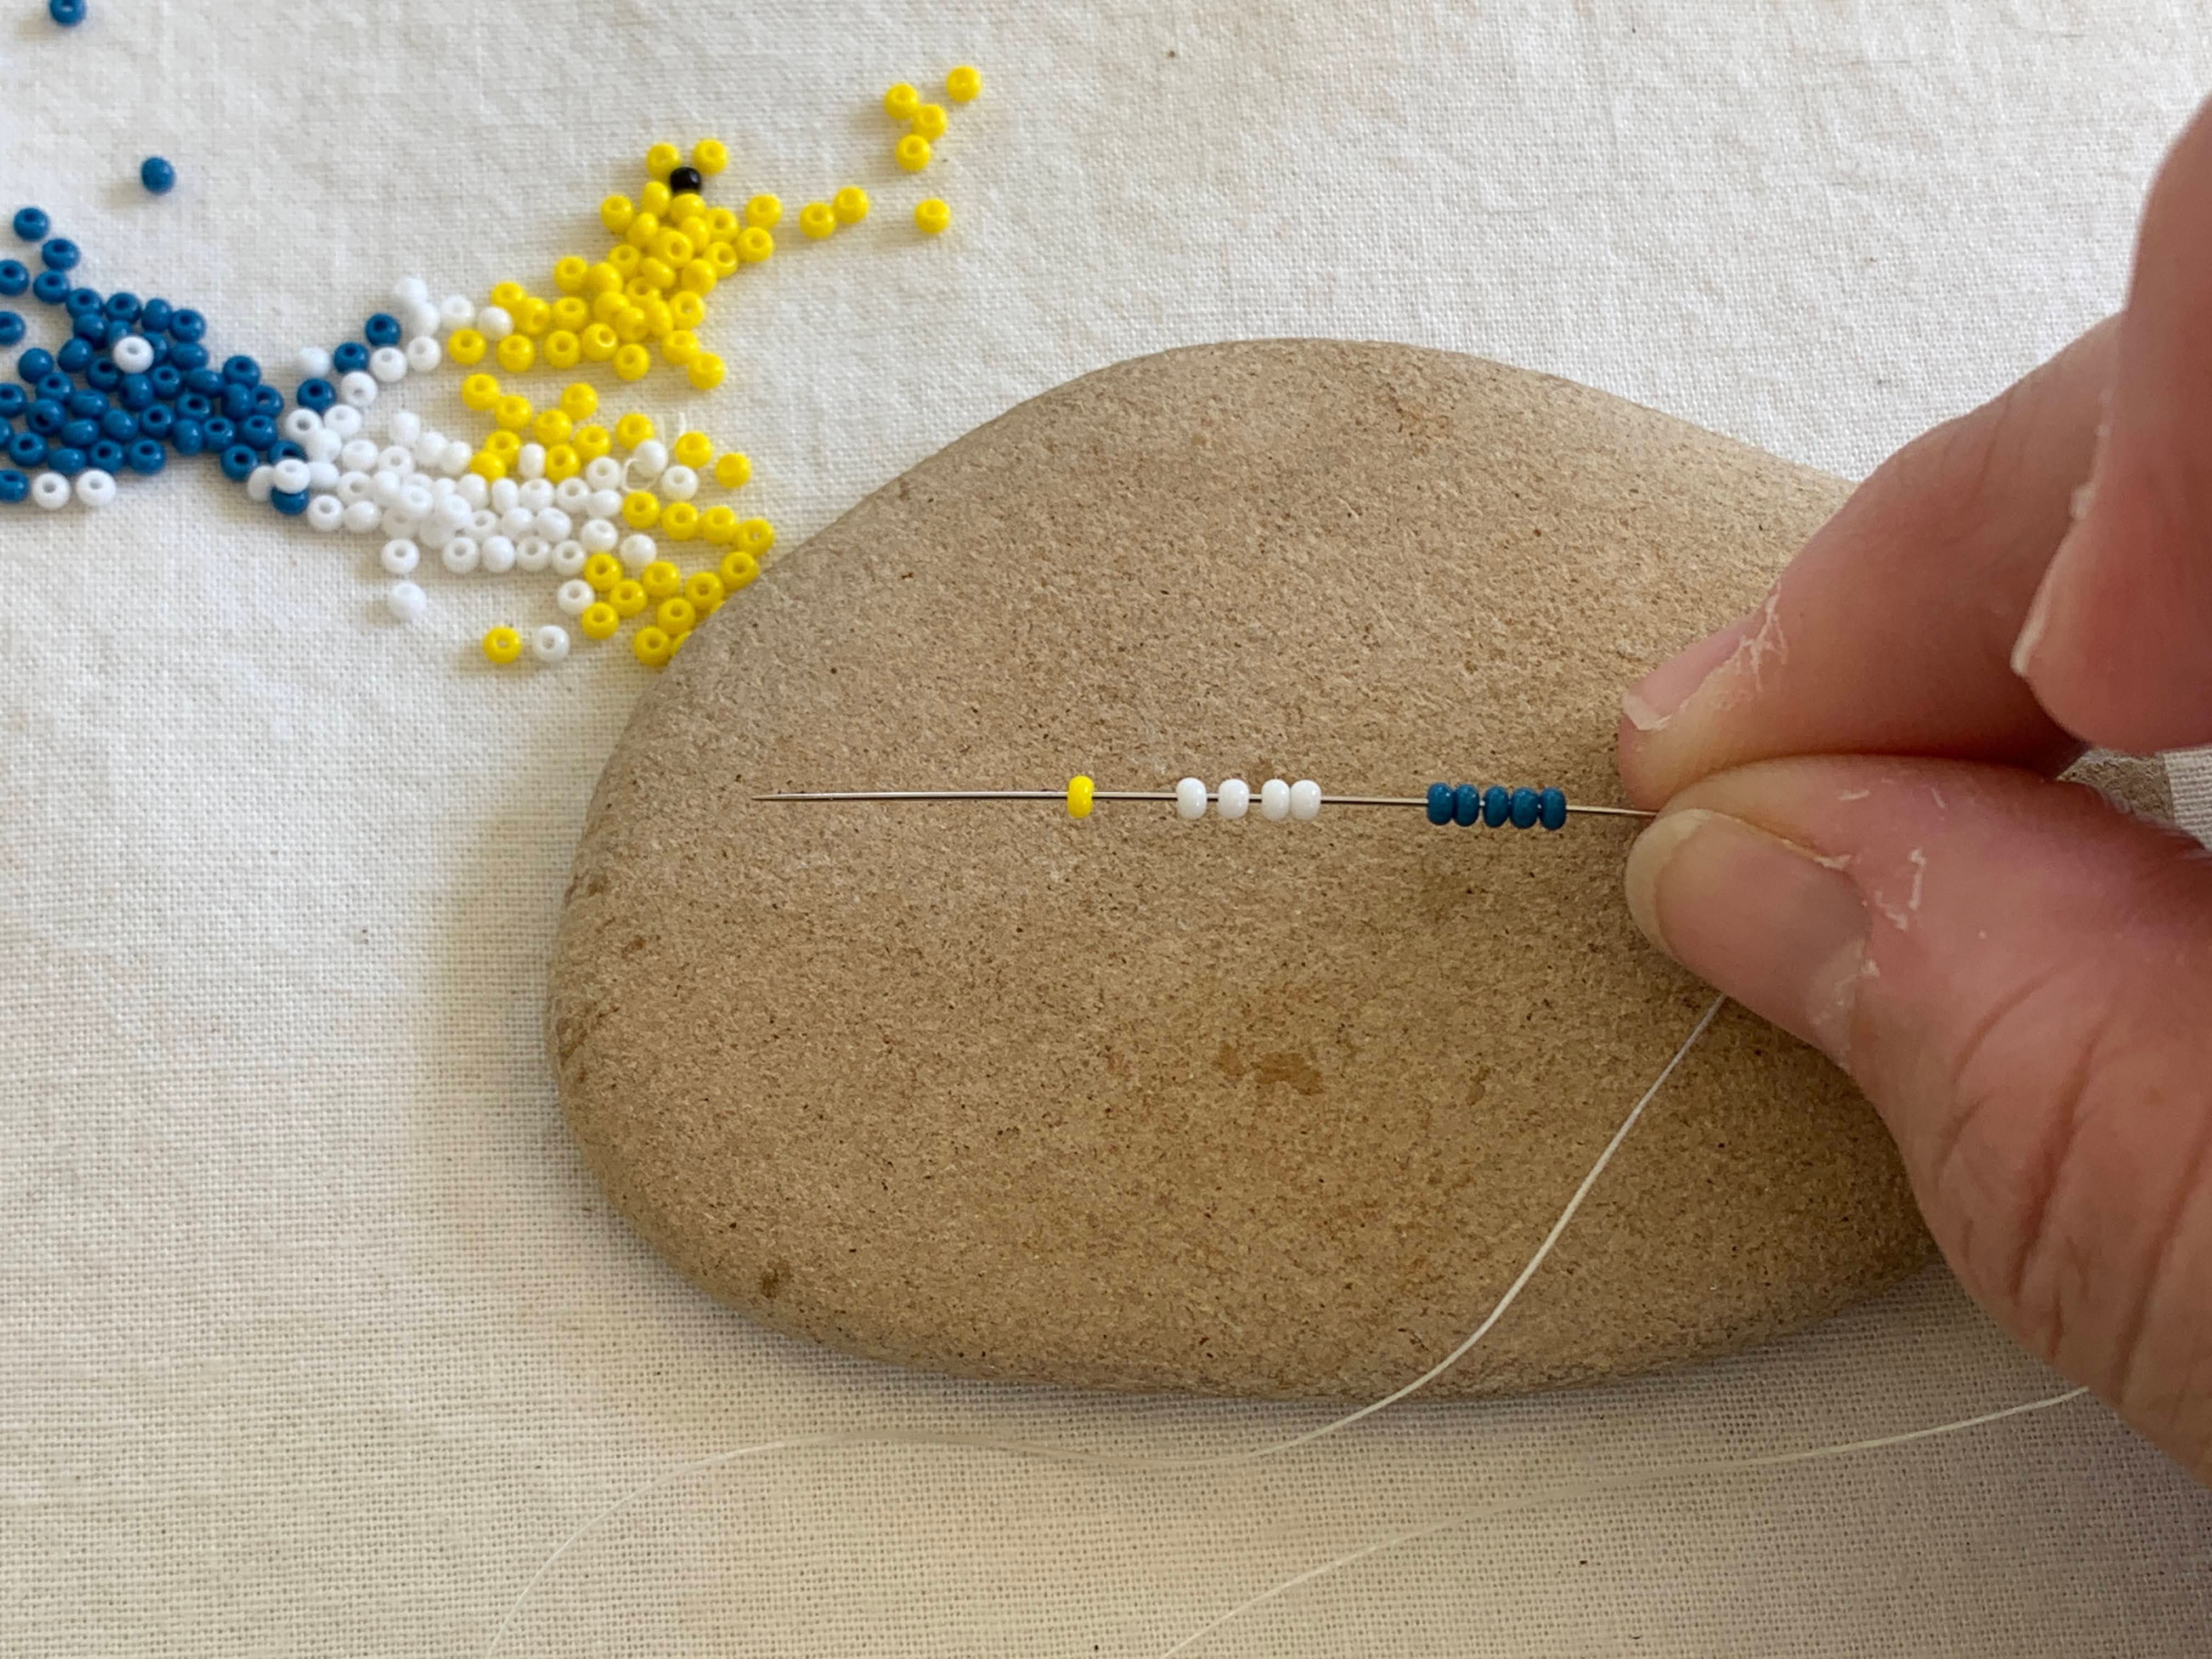
Pick up your spacer beads. In this example, they are the 5 blue beads.
These form the strand between flowers.
Step 4: Add Daisy Petals and Center
Pick up:
- 4 white beads (petals)
- 1 yellow bead (center)
Slide all of the beads down to the stop bead.
Step 5: Make the First Half of the Beaded Daisy

Stitch back through the first white petal bead in the opposite direction.

Pull tight. Arrange the white beads into a half circle surrounding the yellow center bead.
You now have half a daisy.
Step 6: Complete the Beaded Daisy Flower

Pick up 3 more white petal beads
Stitch through the top petal bead (the last petal before the center). Note you are stitching in the same direction that the previous thread went through the bead.
Pull tight and adjust.

Your daisy is complete.
Step 7: Repeat the Pattern
To continue:
- Pick up spacer beads.
- Add 4 petal beads + 1 center bead.
- Stitch back through first petal.
- Add 3 more petals.
- Stitch through top petal bead.
Repeat this pattern to the desired length.
Adjusting for Different Sized Beads
If your flower looks:
- Too tight → use fewer petals
- Too loose → add one more petal
Finishing the Daisy Chain
When your daisy chain is the desired length:
- Remove the stop bead
- Add the clasp of your choice
- Tie secure knots
- Add a small drop of glue if desired.
A flexible jewelry such as E-6000 or G-S Hypo Cement work well. The gel version of super glue also works.
Daisy Chain Video Tutorial
If you prefer visual instructions, watch the short video version of this project.
Frequently Asked Questions About Beaded Daisy Chain
How many beads do you need for one daisy flower?
Most daisy flowers use 6–8 petal beads plus 1 center bead. A common beginner formula is 4 petals + 1 center, stitch back, then add 3 more petals to complete the circle. The exact number may change depending on bead size and center bead diameter.
Why are my daisy petals loose or show the thread?
Loose petals are usually caused by low thread tension or too many petal beads for the bead size. Pull firmly after each pass and adjust the petal count if the flower does not form a tight circle. Using doubled thread or thread conditioner can also improve thread tension which keeps gaps from forming.
Can I use fishing line instead of Nymo thread for daisy chains?
Yes, but the result will feel different. Fishing line such as FireLine creates a firmer, slightly stiffer chain. It does not need to be doubled. Nylon thread like Nymo produces a softer, more flexible drape that is often preferred for bracelets and anklets. Also, nylon threads are easier to knot.
What size beads work best for daisy chain?
Size 11/0 seed beads are ideal for beginners because they are easy to handle and create balanced flowers. Czech seed beads give a traditional look, while Japanese seed beads provide more uniform sizing and symmetry. Use round (rocaille) beads, not cylinder shaped beads like delicas.
How do I make larger or smaller daisy flowers?
To make larger daisies, use larger beads or increase the number of petal beads. To make smaller flowers, use smaller beads and reduce the petal count. When changing center bead size, adjust the number of petal beads so the ring closes neatly around the center bead.
Please visit my sign up page for information on how to be notified of my new projects.
Comments
Post a Comment