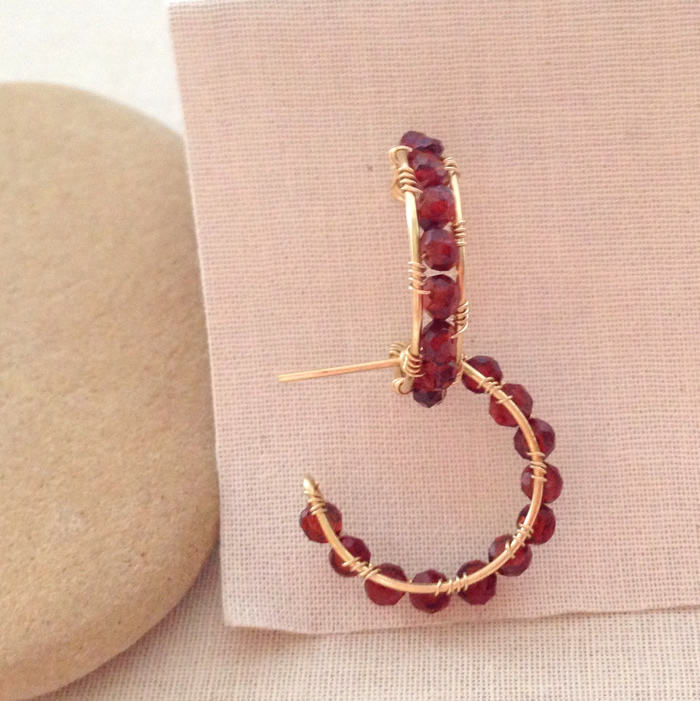
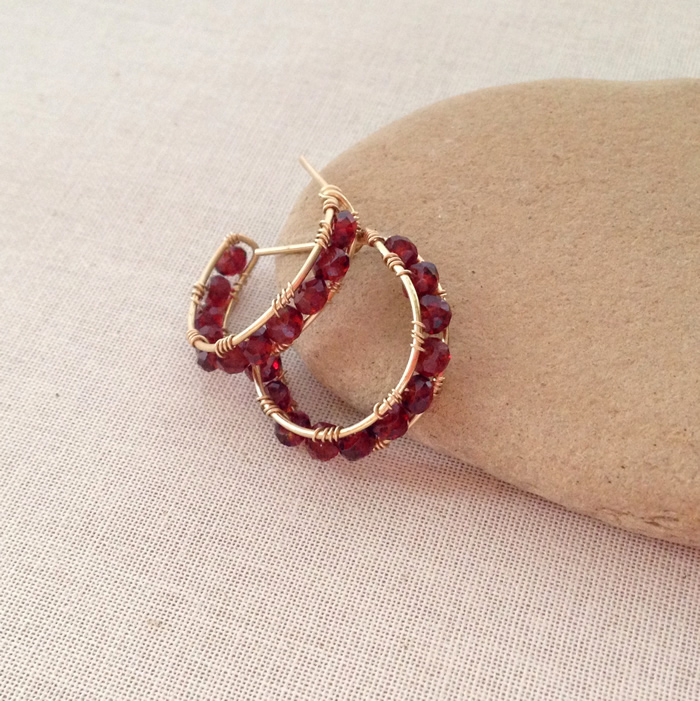
DIY Garnet Hoops
Year of Jewelry 2015 progress update: 2 weeks down, 50 to go...
The theme for this week is garnet, which happens to be the birthstone for all of you January babies.
I love garnets, and with all of the wire hearts I've been making, the idea of deep red garnets wrapped in gold really appealed to me. I don't know where the rest of the design came from, but I can (and will) show you how I made them.

From a materials perspective, I used 20g brass wire for the frame, 4mm red garnet faceted rondelles and 30g gold filled wire to attach the beads.
30g wire is a lot like wire thread. I originally tried using 26g wire to add the beads, but I kept distorting the shape of the wire frame when I was tightening the wraps around the hoop frame. I suspect that 28g wire will work too.
I used red brass for the frame because, in addition to being cheaper than gold filled, it has a harder temper, which means it will hold the hoop shape better. I could have used gold filled or sterling, but would have tumbled the frame before wrapping the beads so it would be stiffer.
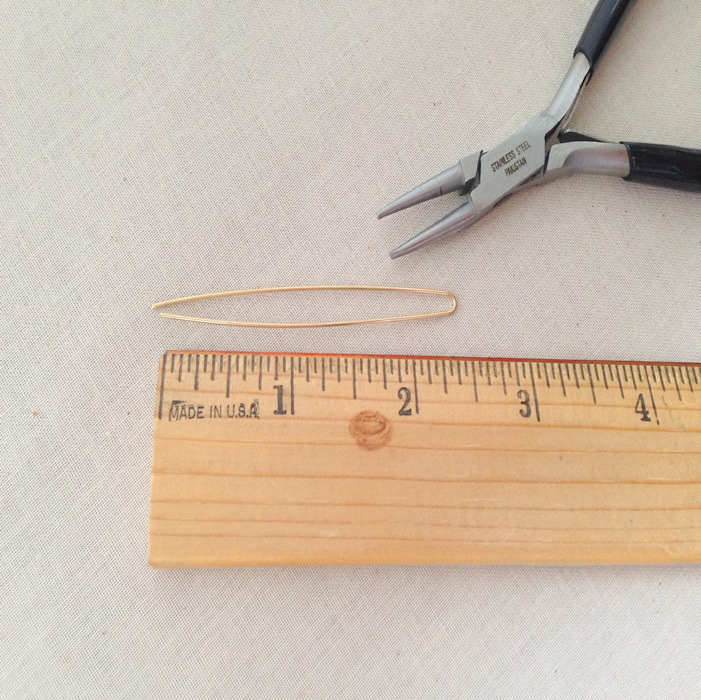
I cut a 5 inch piece of 26g wire to make a finished 1 inch hoop. Using round nose pliers, fold the wire in the middle and squeeze it so you have two parallel wires with a channel about the thickness of your beads down the middle.

Fold the wire around a mandrel to form the hoop.

I use the round mandrel from this set of multi-level mandrels from Bead Smith. As you can tell, I have numbered the steps so I know which I used for various projects.
I've read that a lot of people don't like these mandrels because they are plastic, but I love them. They are lightweight, convenient and surprisingly sturdy. You can't hammer on them, but for shaping circles, triangles, ovals and squares, they work great for me.

My trick to making hoops, is that I start wrapping the wire 2 steps smaller than I want the final hoop earring to be. The smaller starting size accounts for the tendency of the wire to spring back to shape and unwind a little. Wrap it tight on a smaller step and then gradually put it on the larger steps to loosen it to the size you want.
I leave the top of the hoop wire straight for the post that goes into your ear.

To add the beads, secure the 30 g wire with 3 or 4 wraps around the frame. Add a rondelle bead, and secure on the opposite side of the frame with 3-4 wraps.

Instead of wrapping directly across the frame, the wire through the middle is going diagonal. For example, it comes out underneath the frame wire on the left, and the wrap goes over the frame on the right. When I'm done wrapping on the right, the wire will be coming from the bottom side. I'll add a bead and cross the wrap to the top.

If you don't cross the wrap wire in the middle, you will end up with one bead that wraps across the front of the frame followed by a bead that wraps across the bottom. The beads won't align as well when viewed from the side.
Keep wrapping until you have reached the top of the hoop. Then twist each of the beads to straighten them and also space them evenly. They will have a little give - just be patient and gentle in making adjustments.
Also, adjust the hoop shape by placing it back on the mandrel and gently shaping it round again.

I finished the top of the hoop by squeezing the wires together and making a simple wrap.

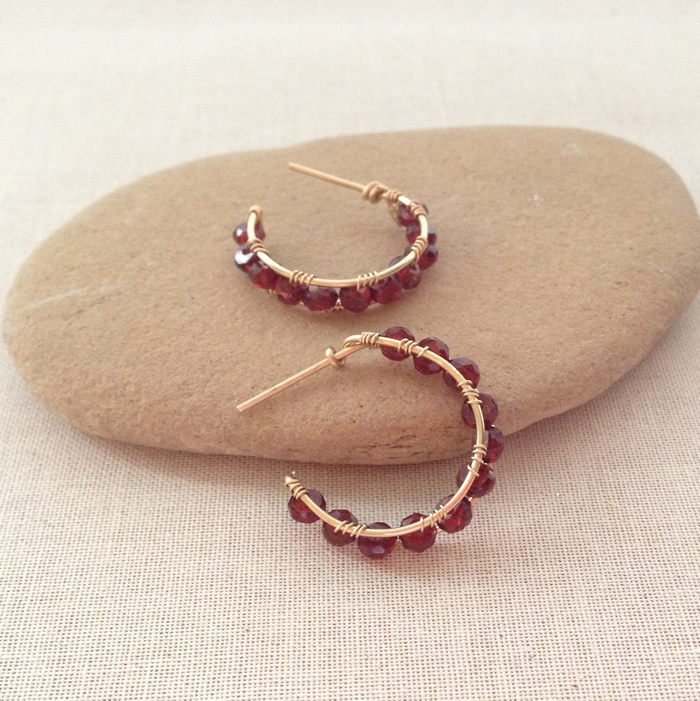
Trim all wires, tuck ends, file sharp edges, especially the ear wires and wear your wonderful new earrings!
I think these earrings will also look great with other bead and wire combinations. They are a pretty timeless style that could be dressy or casual.

I couldn't help but think that the design could work as a ring too. What do you think?
By liking my page on Facebook: Lisa Yang Jewelry on Facebook
I leave the top of the hoop wire straight for the post that goes into your ear.
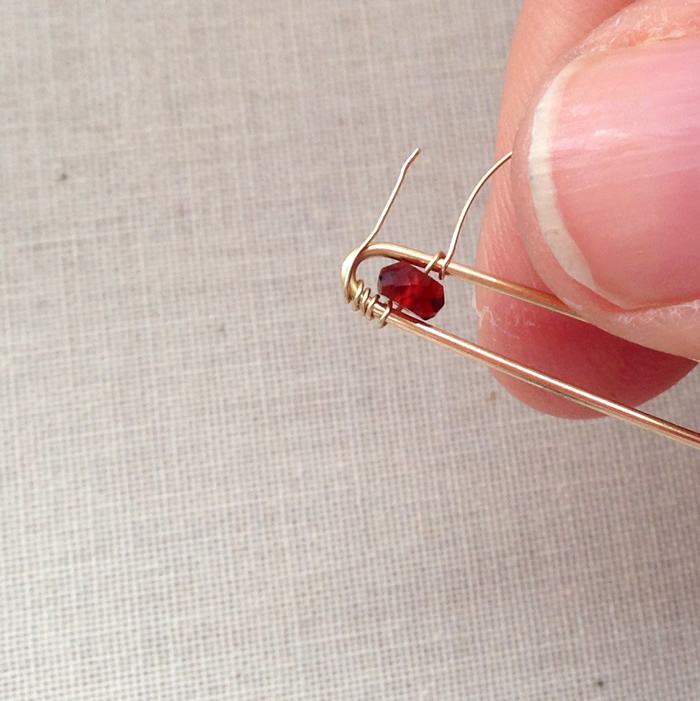
To add the beads, secure the 30 g wire with 3 or 4 wraps around the frame. Add a rondelle bead, and secure on the opposite side of the frame with 3-4 wraps.

Instead of wrapping directly across the frame, the wire through the middle is going diagonal. For example, it comes out underneath the frame wire on the left, and the wrap goes over the frame on the right. When I'm done wrapping on the right, the wire will be coming from the bottom side. I'll add a bead and cross the wrap to the top.
Keep wrapping until you have reached the top of the hoop. Then twist each of the beads to straighten them and also space them evenly. They will have a little give - just be patient and gentle in making adjustments.
Also, adjust the hoop shape by placing it back on the mandrel and gently shaping it round again.

Trim all wires, tuck ends, file sharp edges, especially the ear wires and wear your wonderful new earrings!
I think these earrings will also look great with other bead and wire combinations. They are a pretty timeless style that could be dressy or casual.
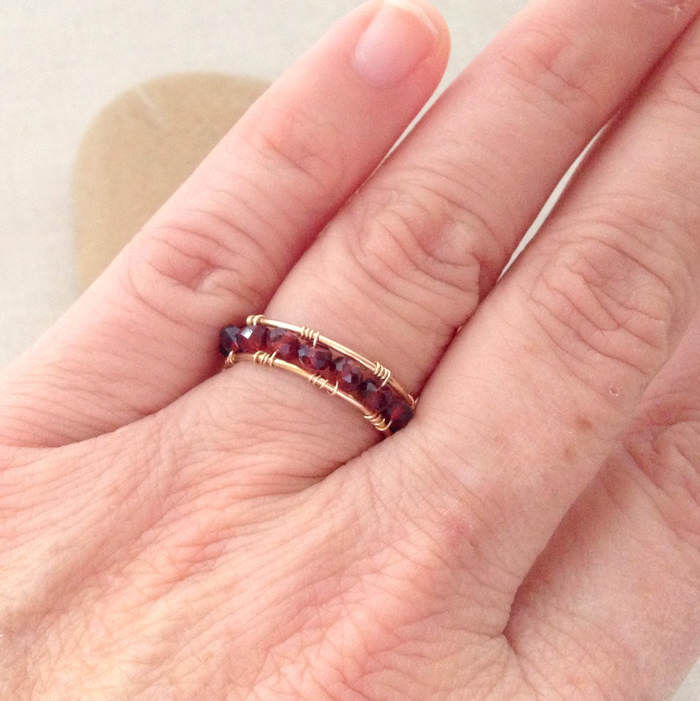
I couldn't help but think that the design could work as a ring too. What do you think?
Sign Up for More Free Jewelry Making Projects
By email: You can sign up by providing your email and you will be notified of new blog posts plus special offers. Make sure you confirm your subscription request by clicking the link in the email.
By following me on Pinterest: Lisa Yang Jewelry on Pinterest
By subscribing on YouTube: Lisa Yang Jewelry on YouTube
And Instagram: @lisayangjewelry
Lisa this is a wonderful idea and never would have thought that I could make this type of earring. You always have such wonderful ideas and tutorials and I've learned so much from you! Thank you!
ReplyDeleteThank you - I hope you'll give it a try and let me know how it turns out. I'm so glad you find my blog helpful.
ReplyDeleteThank you,I have wanted to try this,now with your tutorial I can.I appreciate your sharing your tutorials.:)
ReplyDeleteI'm glad you like it. I hope your earrings come out great!
DeleteI agree it will look great as a ring with some adaptations!
ReplyDeleteSo glad you commented. It may be the perfect time for me to give that a try. Thank you for stopping by. I love your site http://www.beadinggem.com
DeletePS. I will share on my blog so others can come visit!
ReplyDeleteThank you!
DeleteExcellent and well written ! I really understand this and so often I am left with more questions but this time I am ready to go. Love the earrings and the color . Thank you so much for sharing your technique!
ReplyDeleteNever thought I'd be able to make earrings like this! And even tho I'm now wearing a freshly "made by me thanks to you pair" I'm still in shock! You've made my life and skills (and accessories)a little better and for that I've really gotta say thank you.
ReplyDelete