Filling in the lines
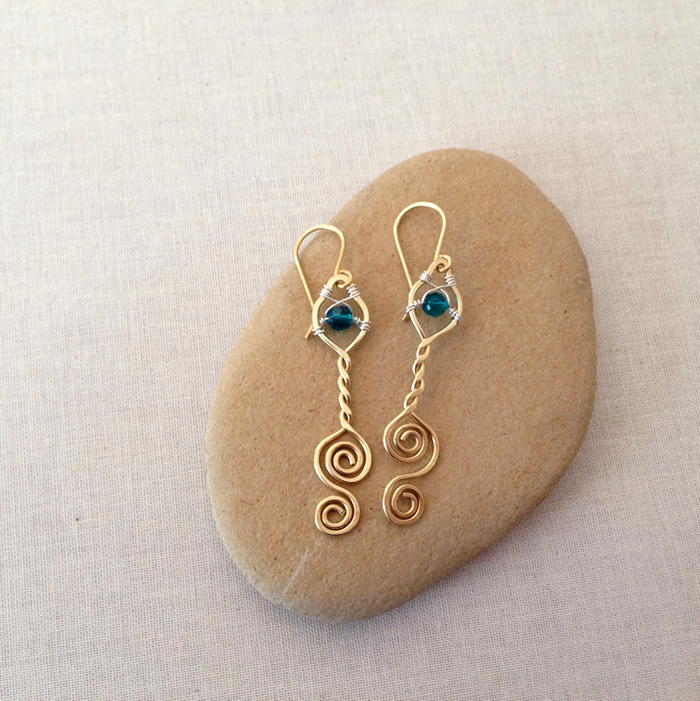
When I made these wire earring frames, I envisioned brick stitch around the edges inside.
An online jewelry making friend, Olga Renteria at Wire Frenzy, sent me this diagram and it seems perfect. (Click the link to see and like her jewelry page. She has beautiful beaded designs and wire work)

But the hammered frame has some sharp edges which could cause the thread to fray or break. Instead, I made another round frame so I can try the brick stitch though. More about that later...

Once I try a complete project from the book, I may change my mind, but for right now, I think this book is AMAZING!! The projects are unique, beautiful to look at, and don't seem that difficult - but I'll need to actually try one before I give it the final nod.
All of this is leading to the fact that I never would have expected to complete these earrings the way I did. (Do you surprise yourself too?)
With the book as inspiration, I decided to try the weaving technique with beads he describes on page 18. Amazon gives you a preview, so you can see it click on this book link Woven Bead & Wire Jewelry, click on the picture of the book to use the Look Inside feature and scroll to page 18 to check it out yourself. I love this feature!!
Basically, the beads are woven on both sides of the frame, front and back, so there is more depth. I used black beads on the back side.
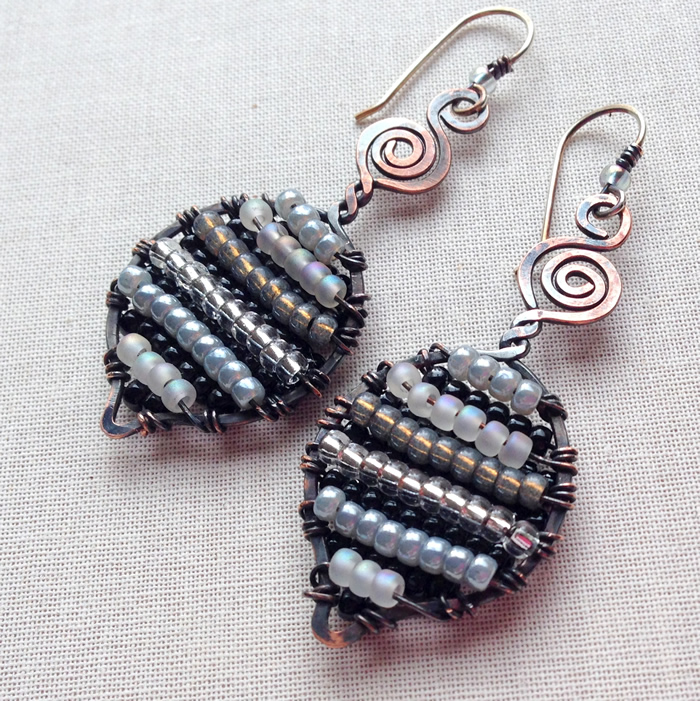
All done - and I love the earrings. Probably more because of the evolution of the design - but I am very happy with the finished earrings too.
Who would expect, the design started here?

A little bit of sparkle, a little bit grunge, a little bit boho - and it's a new style for me. They are well made, I learned some new techniques and will be listed in my Etsy shop shortly. All good stuff. I added sterling silver ear wires with a matching bead and small copper coil to tie it all together. Everything is oxidized with liver of sulfur
And remember that I still want to try the brick stitch around the frame!

These are the new frames I made to try the brick stitch. But as usual, I'm not sure if they'll go this way...

Or this way.
I left the last piece straight because I might want to add a bead or two to it. I tried some nice small lampwork beads or some chevron beads and they both looked nice - so I'm leaving my options open for now.
Do you love jewelry books?
By email: You can sign up by providing your email and you will be notified of new blog posts plus special offers. Make sure you confirm your subscription request by clicking the link in the email.
By following me on Pinterest: Lisa Yang Jewelry on Pinterest
By subscribing on YouTube: Lisa Yang Jewelry on YouTube
And Instagram: @lisayangjewelry
Comments
Post a Comment