I love to take my beadwork with me when I travel. It doesn't matter whether it's a couple of hours in the car or I'm going across the country - if I'm going to be away from housework and cooking for a few days, I figure I'm going to have time to bead and make jewelry.

A big challenge is deciding what to bring on the trip and how to pack it all. The decision on what to take hasn't gotten any easier, but I may have found what I think is the solution for how to travel with my beads. This was my beading projects and supplies for my most recent trip in August.

And this semi-nightmare, was what I brought on the trip before that.
Granted, the hardest part of packing beads is deciding on what you need to bring, but my use of baggies as a storage solution certainly didn't make it any easier! I ended up with lots of extra weight and difficulty finding which beads I brought and selecting which ones to use when it came time to create.

This pretty yellow tri-fold storage and travel solution is called Kit XChange and it is relatively new on the market. Overall, it is a craft storage solution - not specific to jewelry making or beadwork - but it worked great for me. I am sure I will be doing some fine tuning to the way that I use it on future trips - but before I get ahead of myself - let me show you what I brought on the trip.

The Kit XChange is securely closed by a snap closure on the front of the pouch. You just unsnap it to open it.

It unfolds to three layers. This first one is covered with the soft side of velcro (the loop side as opposed to the scratchy hook side). For this trip, I used this side to store some extra baggies to store finished projects or beads or what-nots. When I was on the airplane, I used this portion as my beading surface since the loops help keep the beads from rolling.
About those little baggies, they come in a variety of sizes and have small piece of the loop side of velcro on the back. That is one key to this organization system. It keeps items in place with velcro.

If I unfold again, there are two plastic pouches perfect for tubes, small tools like embroidery scissors (or blunt end surgeon's scissors like the ones I travel with), needle cases, beads, etc. And there is one more section of velcro. This is where I stored more beads and findings and work in progress.
For some reason, when I first set it up, I put the baggies on the last section facing out - probably because that's the way the zippers on the middle section face. But it made no sense. Whenever I opened or closed the case, the baggies were folding over and getting creased.

It didn't take much effort to correct it though and move them to face down when the case is opened like a book.

Here's a look at two of the sizes of ziptop baggies - front and back. They are slightly fancier zip loc bags with velcro to make them stay in place in the Kit xChange organizers. They come in several other sizes - but these are the only two sizes I used on this trip.
I have to admit I hate using such pretty bags just for storing my supplies - but they look really nice. There are also some other pieces to the Kit XChange line that I plan to use for organizing my finished jewelry - so having nice bags is actually a feature that I like.

One of the other pieces of my travel beading setup is this travel bead board. I showed this off once before in a post I did about looming bracelets with Czech vs. Delica beads. It's a convenient carrying space that can be used for a small selection of seed beads or crystals. Nothing too large. With seed beads, you can just dip your needle in and scoop beads out directly onto the needle. The technique takes a little practice, but it works.

One problem I had was that I forgot which side was the top and which was the bottom and ended up opening it up the wrong way. Ack! Left me with a huge pile of bead soup. Now, the bottom looks like this picture, so I can't make that mistake again.

I don't think I ever posted these cute little fruit-colored brick stitch doo-dads yet - so at least I'll add some beaded eye candy here. While the design isn't a stretch for me, the colors certainly were. The colors were inspired by this color palette on Pinterest and a need for me to get out of my comfort zone. These make me happy, even though I still haven't made them into jewelry yet.
The center beads are sea opal glass from Fire Mountain Gems and they are always one of my favorites. They have that opalescent flash that I like in gemstones like labradorite and opal but they're inexpensive glass.
Back to the Kit XChange, I'll be heading on another trip soon and will either re-pack this (since I'm in a wire mood lately) or try one of the other styles of organizers that they sent me to try. There is also a nice single fold book organizer that has a full size pocket on one side and velcro on the other. It seems like that may work better with wire.
I'm also trying to pack less on these trips. I typically only make one or two things, and if I spend a little time before I leave narrowing down the project I'm going to work on, I'm sure I'll be better off. That's the goal, at least.
If it wasn't clear, Kit XChange provided samples to me free to try. I have no obligation to like or write about their product, but so far I do like it and I anticipate several other uses for what they sent me - so you will probably hear more about them in the future. I consider myself abundantly lucky to get to try new products for free and share them with you - but I only tell you about them if I like them and think you will too.
By liking my page on Facebook: Lisa Yang Jewelry on Facebook

A big challenge is deciding what to bring on the trip and how to pack it all. The decision on what to take hasn't gotten any easier, but I may have found what I think is the solution for how to travel with my beads. This was my beading projects and supplies for my most recent trip in August.

And this semi-nightmare, was what I brought on the trip before that.
Granted, the hardest part of packing beads is deciding on what you need to bring, but my use of baggies as a storage solution certainly didn't make it any easier! I ended up with lots of extra weight and difficulty finding which beads I brought and selecting which ones to use when it came time to create.

This pretty yellow tri-fold storage and travel solution is called Kit XChange and it is relatively new on the market. Overall, it is a craft storage solution - not specific to jewelry making or beadwork - but it worked great for me. I am sure I will be doing some fine tuning to the way that I use it on future trips - but before I get ahead of myself - let me show you what I brought on the trip.
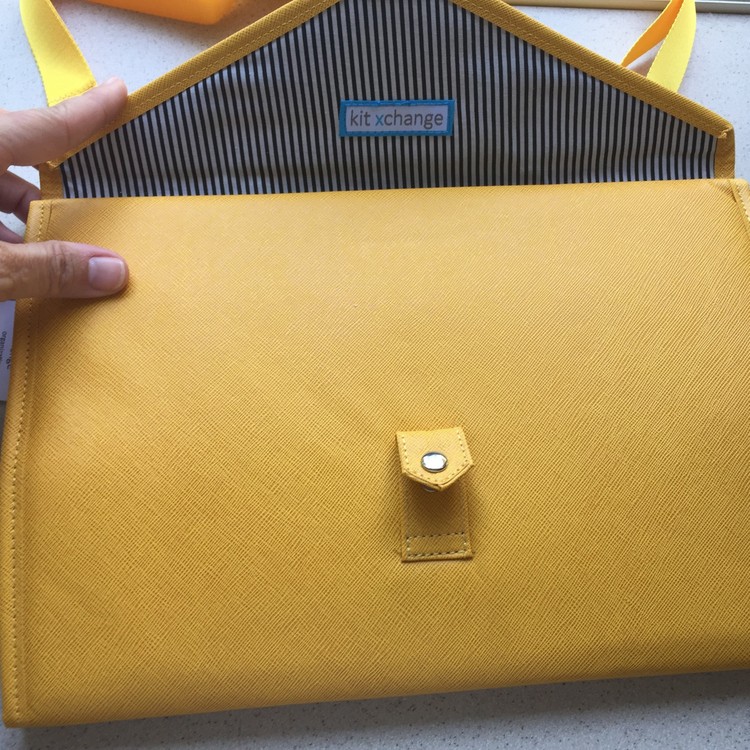
The Kit XChange is securely closed by a snap closure on the front of the pouch. You just unsnap it to open it.
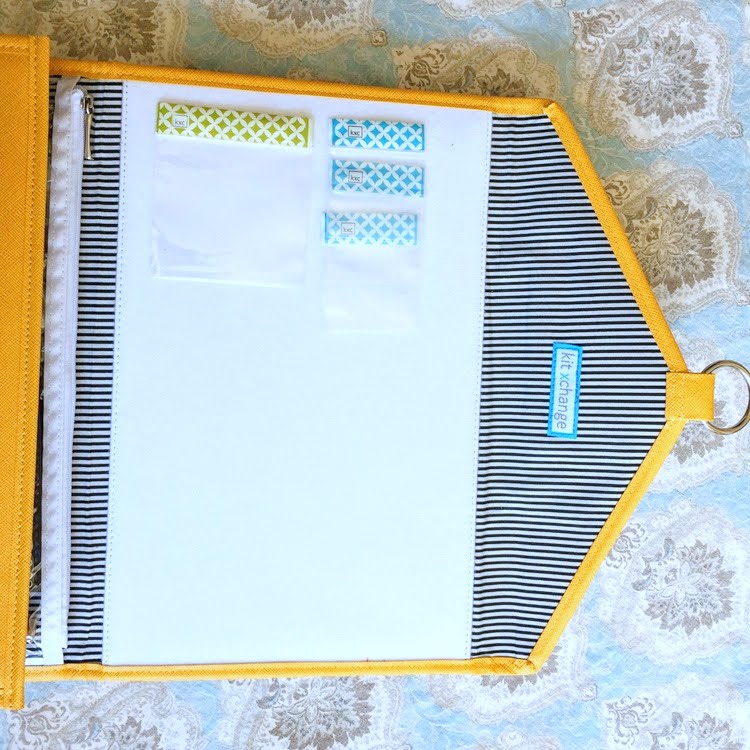
About those little baggies, they come in a variety of sizes and have small piece of the loop side of velcro on the back. That is one key to this organization system. It keeps items in place with velcro.
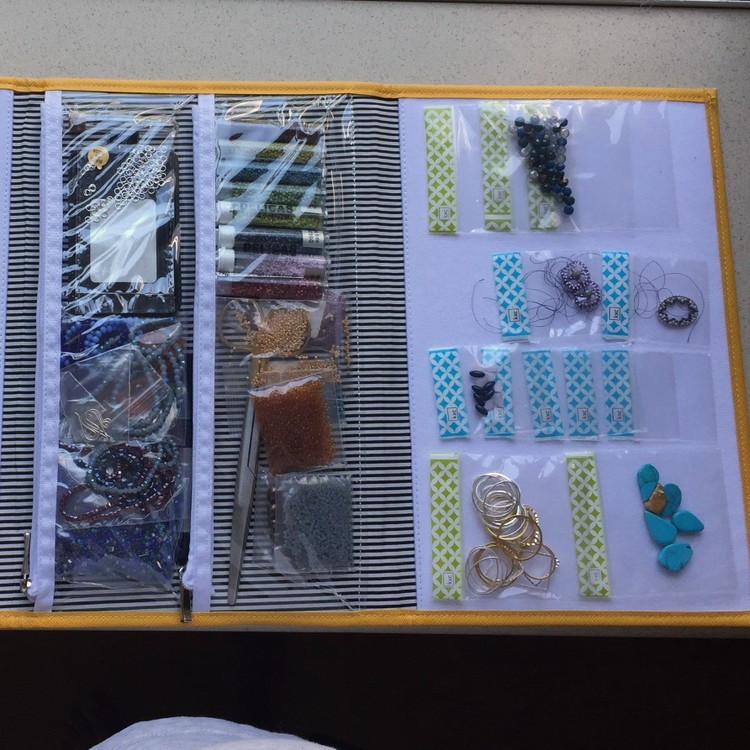
If I unfold again, there are two plastic pouches perfect for tubes, small tools like embroidery scissors (or blunt end surgeon's scissors like the ones I travel with), needle cases, beads, etc. And there is one more section of velcro. This is where I stored more beads and findings and work in progress.
For some reason, when I first set it up, I put the baggies on the last section facing out - probably because that's the way the zippers on the middle section face. But it made no sense. Whenever I opened or closed the case, the baggies were folding over and getting creased.


Here's a look at two of the sizes of ziptop baggies - front and back. They are slightly fancier zip loc bags with velcro to make them stay in place in the Kit xChange organizers. They come in several other sizes - but these are the only two sizes I used on this trip.
I have to admit I hate using such pretty bags just for storing my supplies - but they look really nice. There are also some other pieces to the Kit XChange line that I plan to use for organizing my finished jewelry - so having nice bags is actually a feature that I like.

One of the other pieces of my travel beading setup is this travel bead board. I showed this off once before in a post I did about looming bracelets with Czech vs. Delica beads. It's a convenient carrying space that can be used for a small selection of seed beads or crystals. Nothing too large. With seed beads, you can just dip your needle in and scoop beads out directly onto the needle. The technique takes a little practice, but it works.
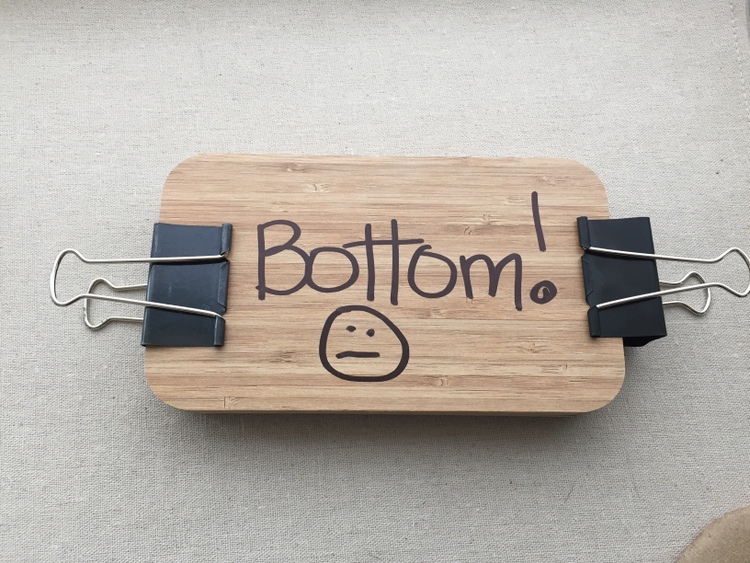
One problem I had was that I forgot which side was the top and which was the bottom and ended up opening it up the wrong way. Ack! Left me with a huge pile of bead soup. Now, the bottom looks like this picture, so I can't make that mistake again.

I don't think I ever posted these cute little fruit-colored brick stitch doo-dads yet - so at least I'll add some beaded eye candy here. While the design isn't a stretch for me, the colors certainly were. The colors were inspired by this color palette on Pinterest and a need for me to get out of my comfort zone. These make me happy, even though I still haven't made them into jewelry yet.
The center beads are sea opal glass from Fire Mountain Gems and they are always one of my favorites. They have that opalescent flash that I like in gemstones like labradorite and opal but they're inexpensive glass.
Back to the Kit XChange, I'll be heading on another trip soon and will either re-pack this (since I'm in a wire mood lately) or try one of the other styles of organizers that they sent me to try. There is also a nice single fold book organizer that has a full size pocket on one side and velcro on the other. It seems like that may work better with wire.
I'm also trying to pack less on these trips. I typically only make one or two things, and if I spend a little time before I leave narrowing down the project I'm going to work on, I'm sure I'll be better off. That's the goal, at least.
If it wasn't clear, Kit XChange provided samples to me free to try. I have no obligation to like or write about their product, but so far I do like it and I anticipate several other uses for what they sent me - so you will probably hear more about them in the future. I consider myself abundantly lucky to get to try new products for free and share them with you - but I only tell you about them if I like them and think you will too.
By email: You can sign up by providing your email and you will be notified of new blog posts plus special offers. Make sure you confirm your subscription request by clicking the link in the email.
By following me on Pinterest: Lisa Yang Jewelry on Pinterest
By subscribing on YouTube: Lisa Yang Jewelry on YouTube
And Instagram: @lisayangjewelry
Comments
Post a Comment