
Decorative knots are handy to know for jewelry making. They form the basis of macrame - making knots with different materials to create a decorative pattern. Chinese knotting is a Chinese folk art with ties to Buddhism and Taoism. Chinese knots use a single length of cord that is woven into different shapes with each shape having a symbolic meaning.
This article will show you the differences between a Josephine knot and a double coin knot and how to tie each one.
The Josephine and double coin knots are very similar. Both are graceful looping knots that can be tied for a variety of purposes using many different materials. One thing about knots, is that they are used in many different contexts.
In a practical sense, knots are used to join cords, or tie something down - sailing or fishing come to mind as useful examples. But they can also be used decoratively - chinese knotting and macrame . Of course, the knots go by different names for each of these purposes.
The primary difference between the Double Coin Knot and the Josephine Knot is that one is tied in the center of a single cord (the double coin knot) and the other, the Josephine knot, is tied using two parallel cords - in other words by tying two cords together.

Above is the double coin knot. As you can see, it is ideal to add a pendant or charm with a center loop.
The Josephine knot is similar but the knot straddles between two cords.
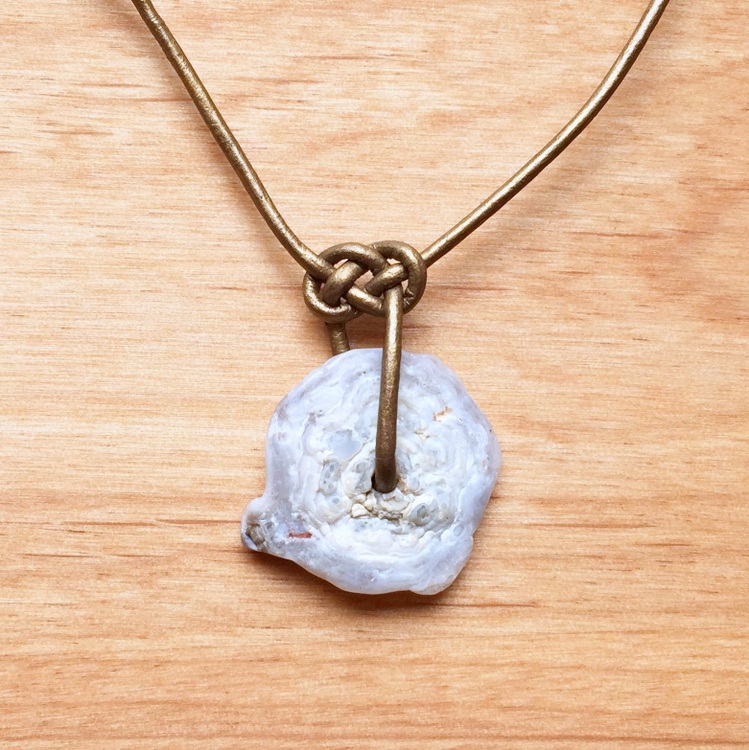
Comparing the two, you'll see that the double coin knot has an extra loop in the middle - which results from tying the knot in the center of a single cord. But here's something interesting, if you use that center to hang a long pendant, then the double coin knot looks suspiciously like the Josephine knot.
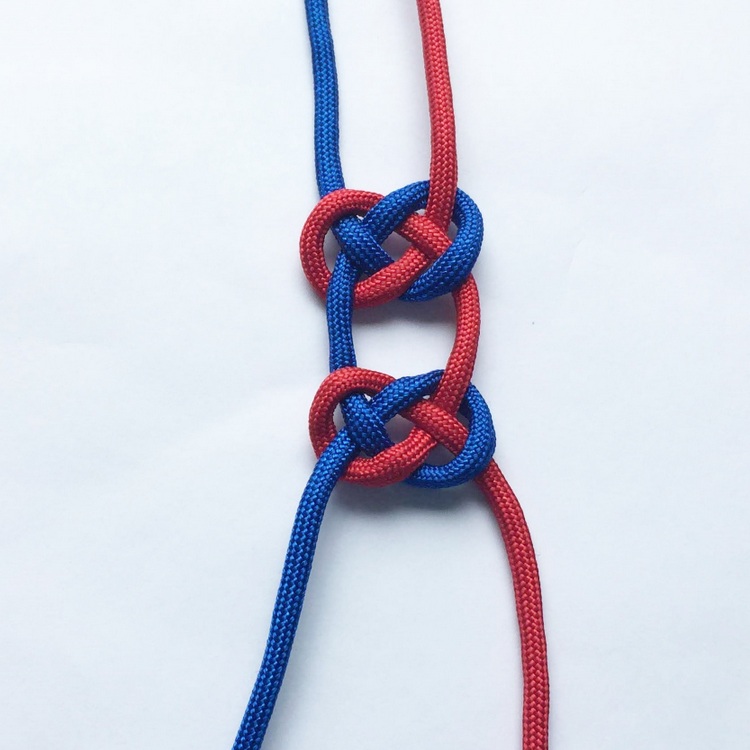
Practically speaking, the double coin knot is a great decorative knot for earrings or to hang a pendant. The Josephine knot is a good decorative knot when you are joining two cords. Both look really nice when tied using thick cord or more than one cord (see the red/blue Double Coin Knot above).
To get started making decorative knots, it helps to have an appropriate cord. I like to use Chinese knotting cord. I wrote an article about using Chinese knotting cord for macrame bracelets that may help you understand why it works so well for decorative knotting including macrame. You can purchase Chinese knotting cord in lots of different colors in large or small spools on Amazon.
The Josephine knot example below is made using 3mm diameter Chinese knotting cord.
To make a Josephine knot, start with two parallel cords situated about an inch apart. Two different color cords and working with larger sized cord make learning this much easier. Also, because there's a lot of looping, having long pieces of cord make it much easier to slide the cord into the tight spaces.

Using the left (blue) cord, loop over the red (right) cord end.

Continue looping around, bringing the blue (left cord) under the red (right) cord.

Slide the end of the blue (left) cord over the right cord loop.

Then slide the blue (left) cord under itself.

And finally, bring the cord over the red (right) cord. So, in summary, those steps were right loop, left loop, over, under, over, under, over, pull tight. I actually repeat that to myself as I'm tying this - so it may help someone else too.
Now, let's give the double coin knot a try.

For this knot, you will need one piece of cord. I am using a length of Chinese knotting cord about 12 inches long and 2 mm in diameter.

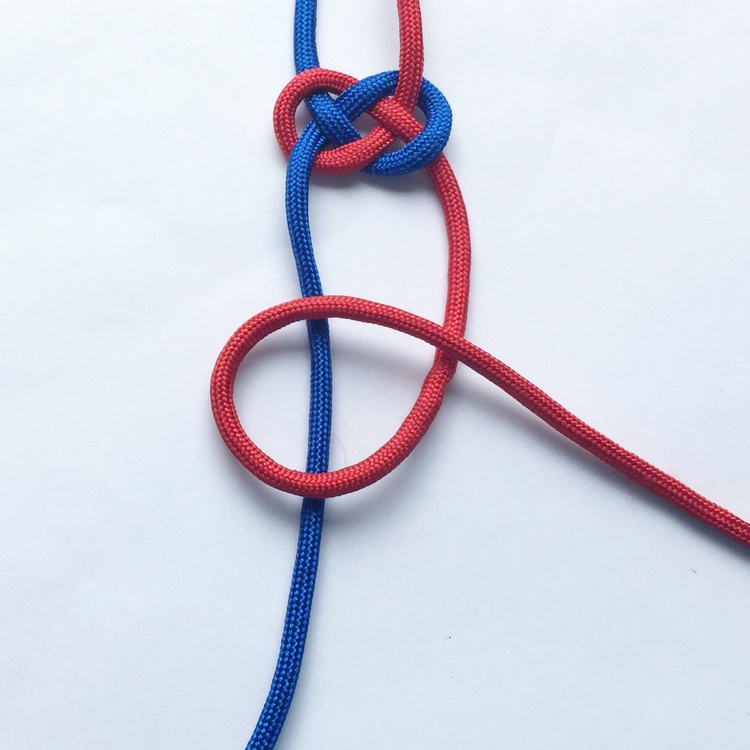
Make a loop with the cord as shown above.

Continue looping the top section of the cord around and over the first loop.

Slide this cord under the other end of the cord at the base of the loops. To make it easier to feed the cord end through the loops (and for you to follow the path), I attached a thin piece of wire to one end of the cord. This is a makeshift needle.

Feed the cord end over the top loop and under the next cord.


Here, I've flipped the knot over before I continue to tighten the cords. Gently pull the cords to tighten. The loop that I've left longer is where you may hang a pendant or bead from if desired.

This is how your knot looks once it is tightened.
These knots work well using stiff cords with body, like leather, or you can even use beading wire strung with seed beads. If the knots get pulled on a lot, they can get pulled out of shape, so they may need to have the cords glued in place.
You can keep up with my latest posts by following me on social media or signing up for emails. See my social media and contact page for options.
Comments
Post a Comment