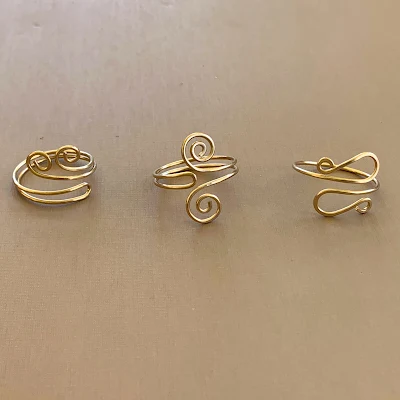
This ring will have you thinking of the beach every time you wear it!
The wave wire ring should be easy for an advanced beginner, but for best results you will need to have a few tools beyond the basic wire wrap tools, such as a hammer and bench block.
Materials:
6 inches 16 gauge or 18 gauge wire
12 inches 26 gauge wire
Tools:
Ring Mandrel or Round Step Mandrel
The ring pictured is made with 18 gauge jeweler's brass wire. Brass is relatively stiff wire. If you are using softer wire, like copper or craft wire, 16 gauge wire will produce a sturdier ring.
1. Cut a piece of wire for the ring body. I started with a piece about 6 inches long for a size 8 ring. File the cut ends of the wire with a nail emery file
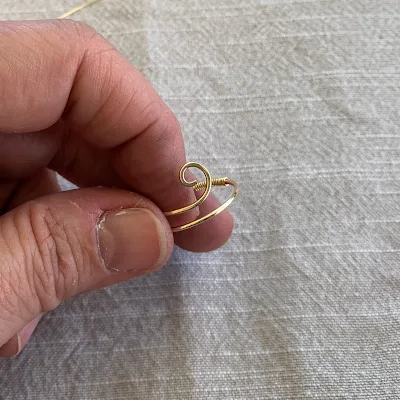
2. Form the curl of the wave on one end of the wire using your round nose pliers. The size and how tight to make the curl is up to you. A tighter curl will hold its shape better than an open one. Hammer the curl on your bench block to work harden it and flatten the wire a little.
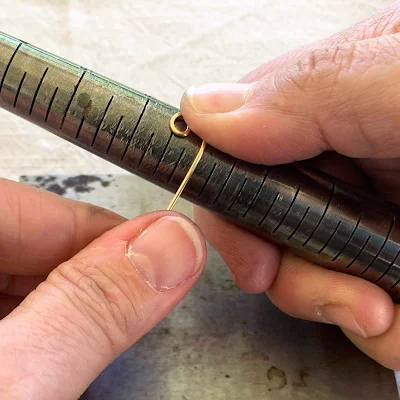
3. Shape the wire around the ring mandrel. I usually shape it one size smaller than the finished ring will be. The wire will loosen when you remove it from the mandrel. Be sure to press tightly so the wave curls around the mandrel.
4. Wrap the wire tail all the way around the mandrel.
5. Remove the wire from the mandrel. You can trim wire end to the length that is appropriate.
6. This is also a good time to make sure the size is correct. Once you secure the ring band, the ring size can no longer be adjusted.
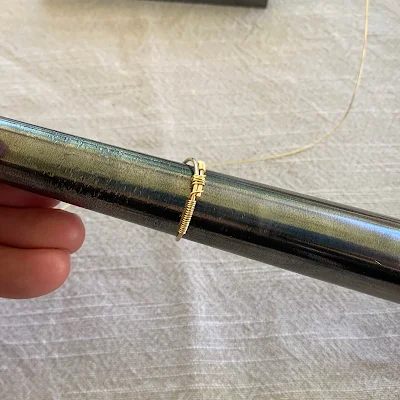
7. Attach the piece of 26 gauge wire to one side of the ring band. Leaving a short tail will give you something to hold on to.
8. Wrap around the single wire until you come to the double wire area. The easiest technique I found to wrap the wire is to push the wire through the center of the ring with my index finger and then pull the long tail through.
9. When you get to the double wire area, just continue wrapping. I found it easier to 'bridge the gap' by opening up the wrap a bit.
10. Continue wrapping over both wires to make sure they are secure.
11. After wrapping around both wires, I went back to securing the tail around a single wire, just to keep things symmetrical. I think it also helps keep the wrap tight and even. The two wires wrapped can slip, but when they are surrounded by a single wire wrap on either side, it will be held in place.
12. When you are done wrapping, trim the wire ends. I do my best to find a spot where the wire is not likely to catch on anything or unwrap.
13. Using flat nose pliers, push the wraps flat against the ring wire to keep them in place.
14. Make sure the wire is still the right size and use the ring mandrel to make sure the ring is still round.
15. Finishing the ring is up to you. I like to polish it with a few swipes of fine steel wool and then put it in a rotary tumbler half filled with water, a drop of dish soap and steel shot. I tumble for about an hour - which shines the ring as well as hardens the rest of the wire.
Isn't it pretty?
You can wear the wave facing up or down.
If you'd like to see more of my projects, please visit my Sign Up page to be notified of new tutorials.
If you enjoy making wire rings, stay tuned - I made a few other styles that I will publish tutorials for soon.


Comments
Post a Comment