I made these wire wrapped pendants several years ago when I was writing as the beadwork expert for About.com. They use pre-made frames made by Beadalon called Wrappers. At the time, they were sent to me as part of goody bag of products for me to review.
I have always really liked the idea and they are super easy to use.
They may be discontinuing the Artistic Wire Wrappers frames, since I haven't seen them as widely available or in as many shapes as they were previously. You can still find them on Amazon, EBay and Fire Mountain Gems though.
But, even if they are being discontinued, it is not that difficult to adapt this style to any shape frame you may find. Beads can be kept in place by adding a coil to the frame like these pearl and crystal mosaic earrings or by using a file to make your own little notch (a technique I'm going to try!)
But back to using the wrappers - which is definitely the easiest technique.
I sorted through my stash of polished stones to find a pleasing combination of stone shape and frame shape. In addition to wrapping an undrilled stone, I have used the wrapper frames to attach beads on the outside of the frame and to add wire with beads across the frame.
I used 10 inches of 26g gold colored wire for this project, and I think it worked perfectly. I am sure this will also work with 22g and 24g wire too. For caging a stone, thicker wire may overshadow the center stone.
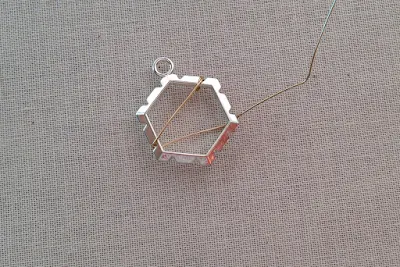
From a tools perspective, you need wire flush cutters and chain nose pliers. Attach the wire by wrapping it around one of the grooves on the edge of the frame.
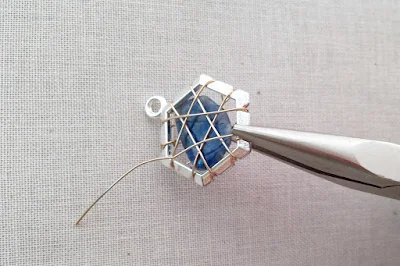
Wrap the wire across the frame. There is no need to do a complete wrap around each groove, just place the wire in a groove and continue around the frame to another groove on the other side.
I started wrapping so I would have support for the stone. Then I slide in the stone, positioned it and continued wrapping.
After wrapping through all of the grooves, you can wrap the wire around one of the grooves to secure the tail. This is the same method that I used to start the wire wrap.
I have to admit, wrapping the wire around the frame is somewhat addicting. It was so easy and fun to see how it was coming out, that I didn't even stop to take pictures along the way. Next thing I knew - it was done and I just had to secure and snip the tail end off. That's the caging method of wrapping.
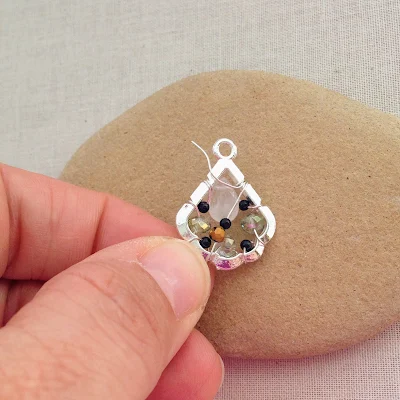
I also did more of a mosaic wire wrap style. I tried laying out beads to make sure they would fit first.
And then used 26g wire to wrap the beads to the edges. The wire is coming from the back, I add a bead and continue the wrap around the front over the frame.
This last project with the wire wrapper component was the easiest. I used separate pieces of wire to neatly add some interesting rows of lapis and pearl beads. So easy - but one of my favorite pendants!
I hope you can still find wire wrapper components - or are inspired to make your own by adding coils or notches to shapes you find.
For more free tutorials and projects, please follow my social media accounts.
By email: You can sign up by providing your email and you will be notified of new blog posts plus special offers. Make sure you confirm your subscription request by clicking the link in the email.
By following me on Pinterest: Lisa Yang Jewelry on Pinterest
By subscribing on YouTube: Lisa Yang Jewelry on YouTube
And Instagram: @lisayangjewelry


Comments
Post a Comment