
Making consistent wire loops is one of the most important skills in wire jewelry making, and one that many beginners struggle with. Loops can easily end up uneven, teardrop shaped, or different sizes when using traditional round nose pliers.
A tool that makes this process much easier is 6-step looping pliers. These pliers help create perfectly round and consistent loops without the guesswork of positioning the wire along a tapered jaw. The pair I use most often are the 6-step looping pliers from the Beadsmith.
This article explains what 6-step looping pliers are, how they work, and why they are one of the easiest tools for improving your wire jewelry loops.
This post contains affiliate links. If you purchase through these links, I may earn a small commission at no additional cost to you.
What Are 6-Step Looping Pliers

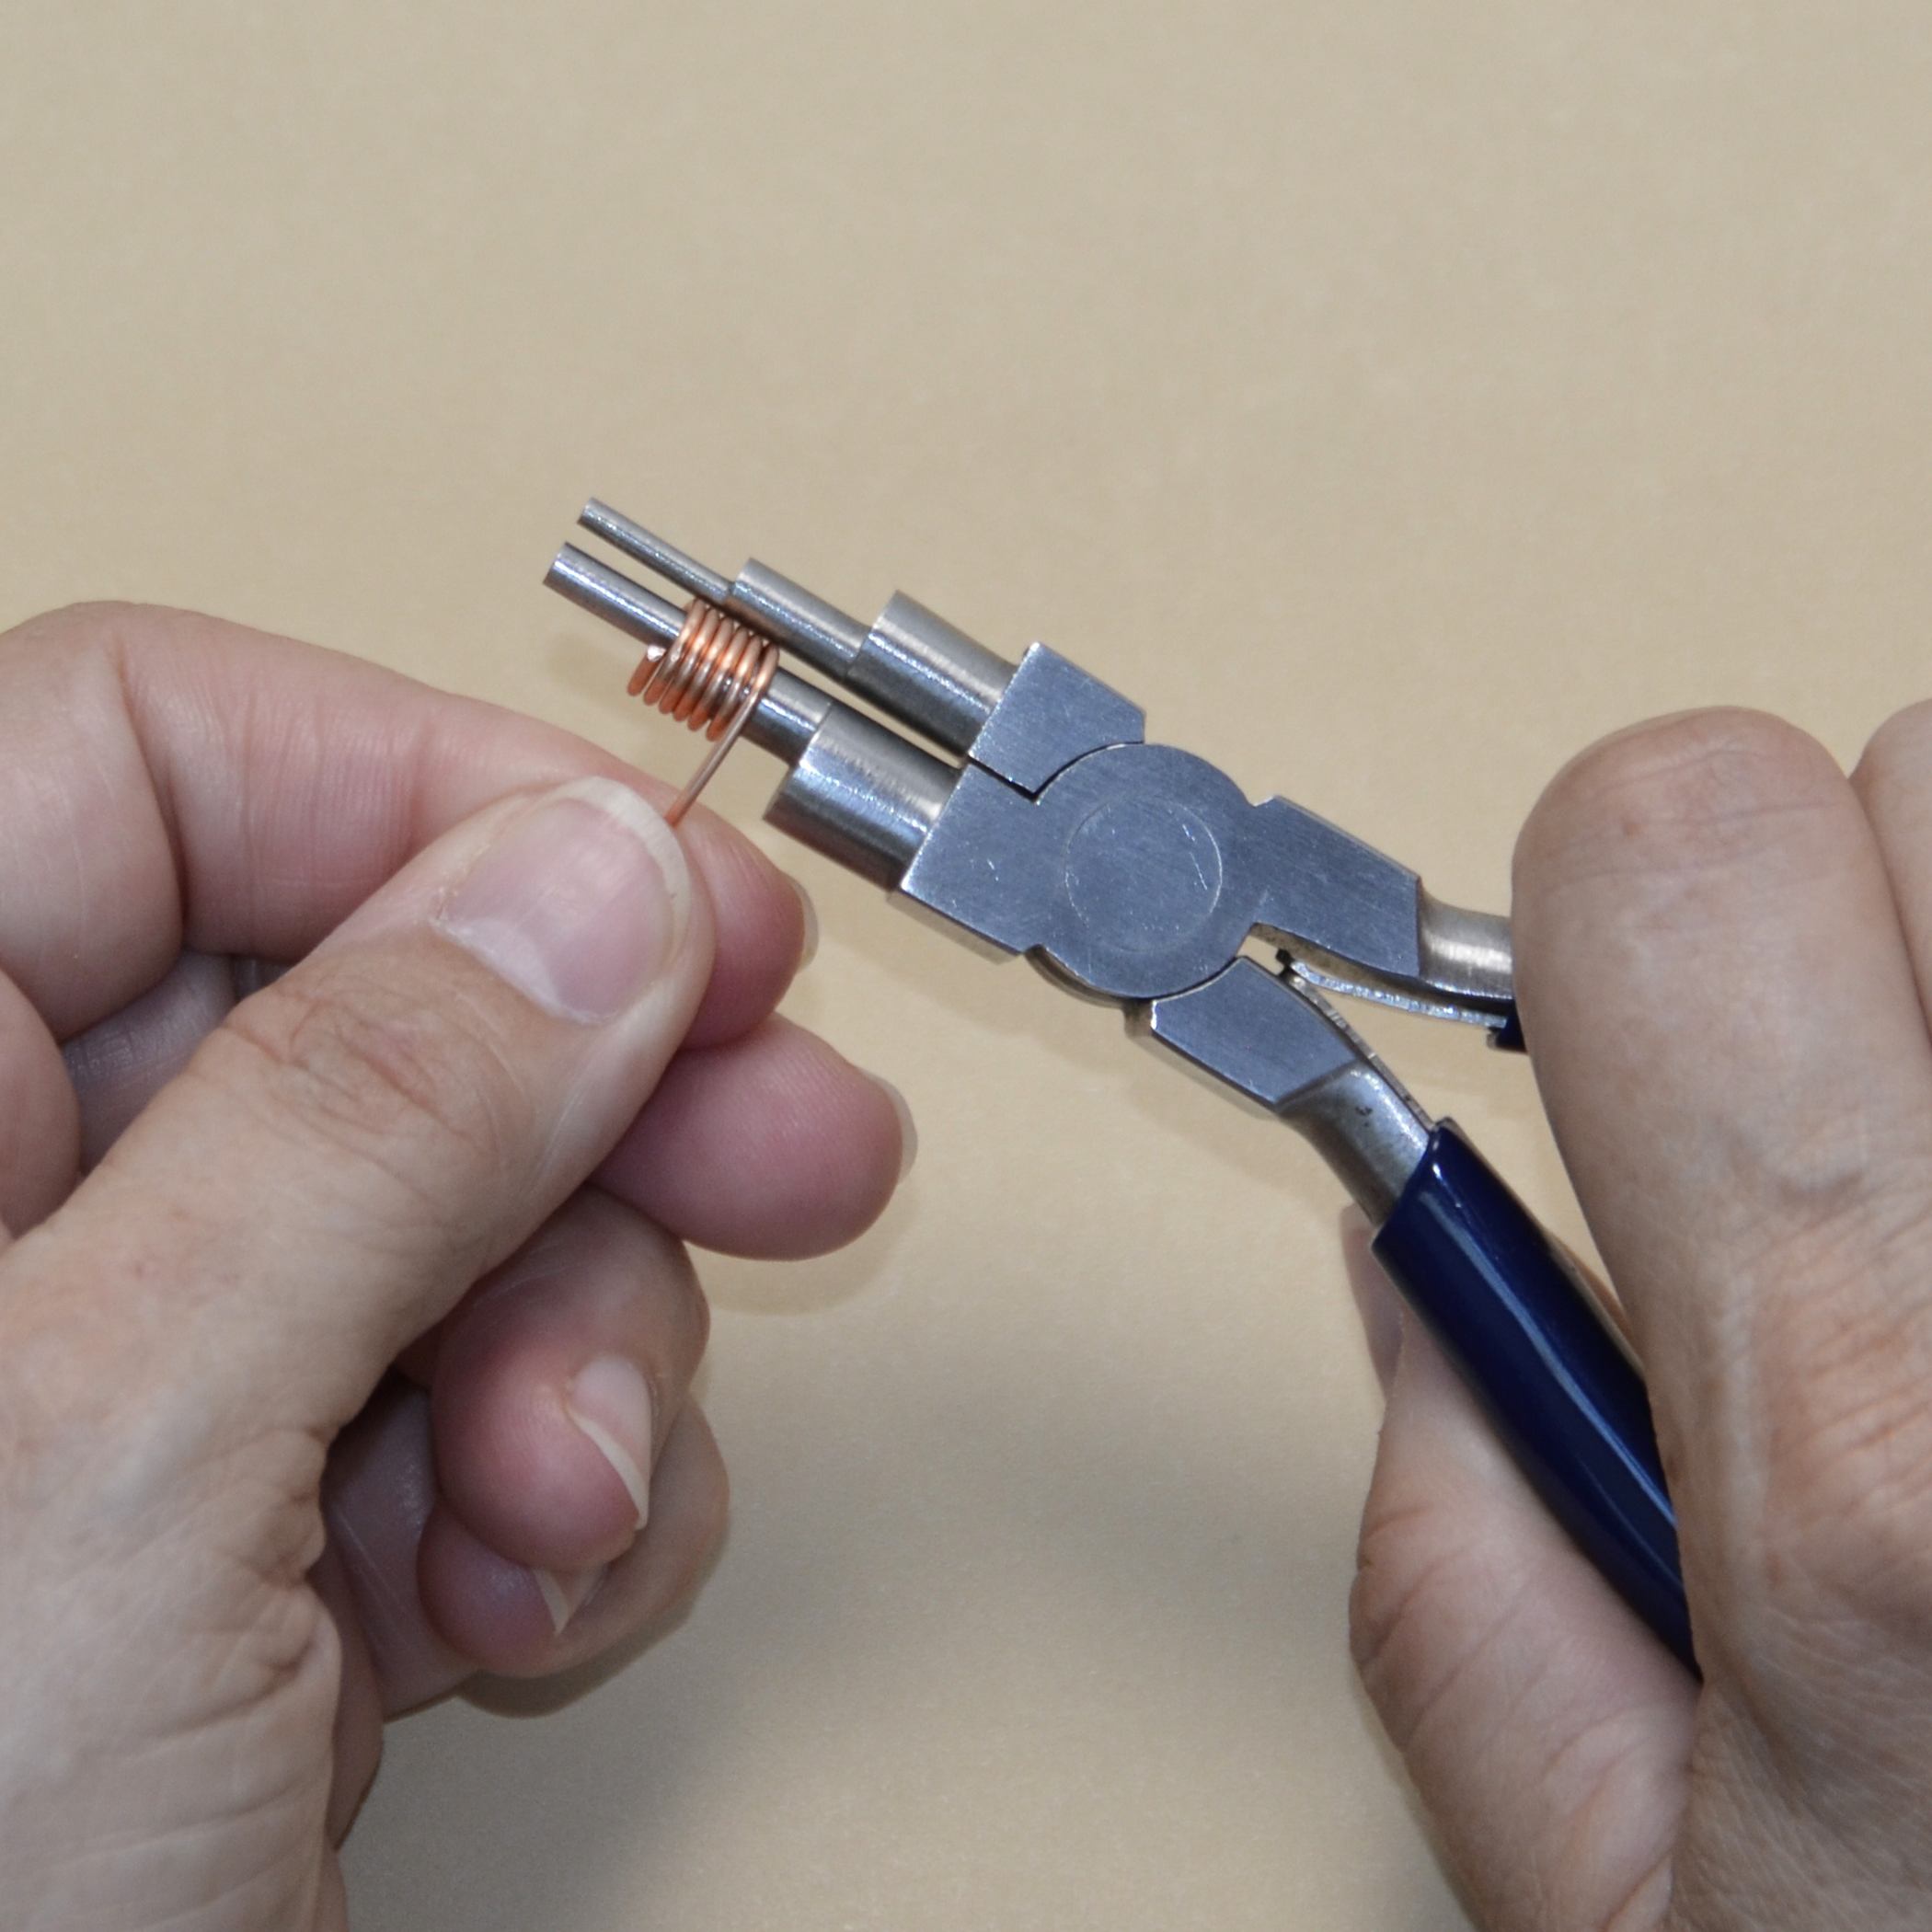
6-step looping pliers are a type of round nose plier designed with six cylindrical steps built into the jaws. Each step forms a different loop size.
Unlike traditional round nose pliers, which taper from small to large, these pliers provide fixed loop sizes. When you place the wire on the same step each time, you create loops that match exactly.
These tools are sometimes called bail making pliers because they are also used to form pendant bails.
Typical loop sizes on 6-step pliers include small loops for headpins and connectors, medium loops for decorative accents or jump rings, and larger loops that can be used for ear wires or decorative wire shapes. The loop sizes on the 6-step pliers from the Beadsmith range from 2 - 9 mm in size.
Why 6-Step Looping Pliers Make Better Loops

One of the biggest advantages of 6-step looping pliers is consistency. With tapered round nose pliers, it can be difficult to position the wire at the exact same point each time. Even marking the pliers with a Sharpie does not always guarantee identical loops.
Step pliers solve that problem because each step has a fixed diameter. As long as you place the wire on the same step, the loop will always be the same size.
This makes them especially helpful when making multiple wire links for rosary chains, earrings, or bracelets where matching loops are important.
They are also very helpful for beginners. Many new jewelry makers struggle to form round loops because the wire tends to slide along tapered pliers. The cylindrical steps guide the wire into a round shape automatically.
Wire Sizes That Work Well with Looping Pliers
6-step looping pliers work with a wide range of jewelry wire gauges.
I commonly use them with 26 gauge, 24 gauge, and 22 gauge wire when making bead links and loops above headpins. They also work well with thicker wire such as 20 or 18 gauge copper when making ear wires or larger decorative loops.
Very thin wire sometimes raises concerns about slipping between the jaws, but in practice most standard jewelry wire gauges work well.
Projects You Can Make with 6-Step Looping Pliers

These pliers are designed for loops, but they can also be used to create several common wire jewelry components:
• bead links for rosary chains
• earring wires
• pendant bails
• wire coils for jump rings
• decorative wire shapes
How to Make a Wire Loop with 6-Step Pliers
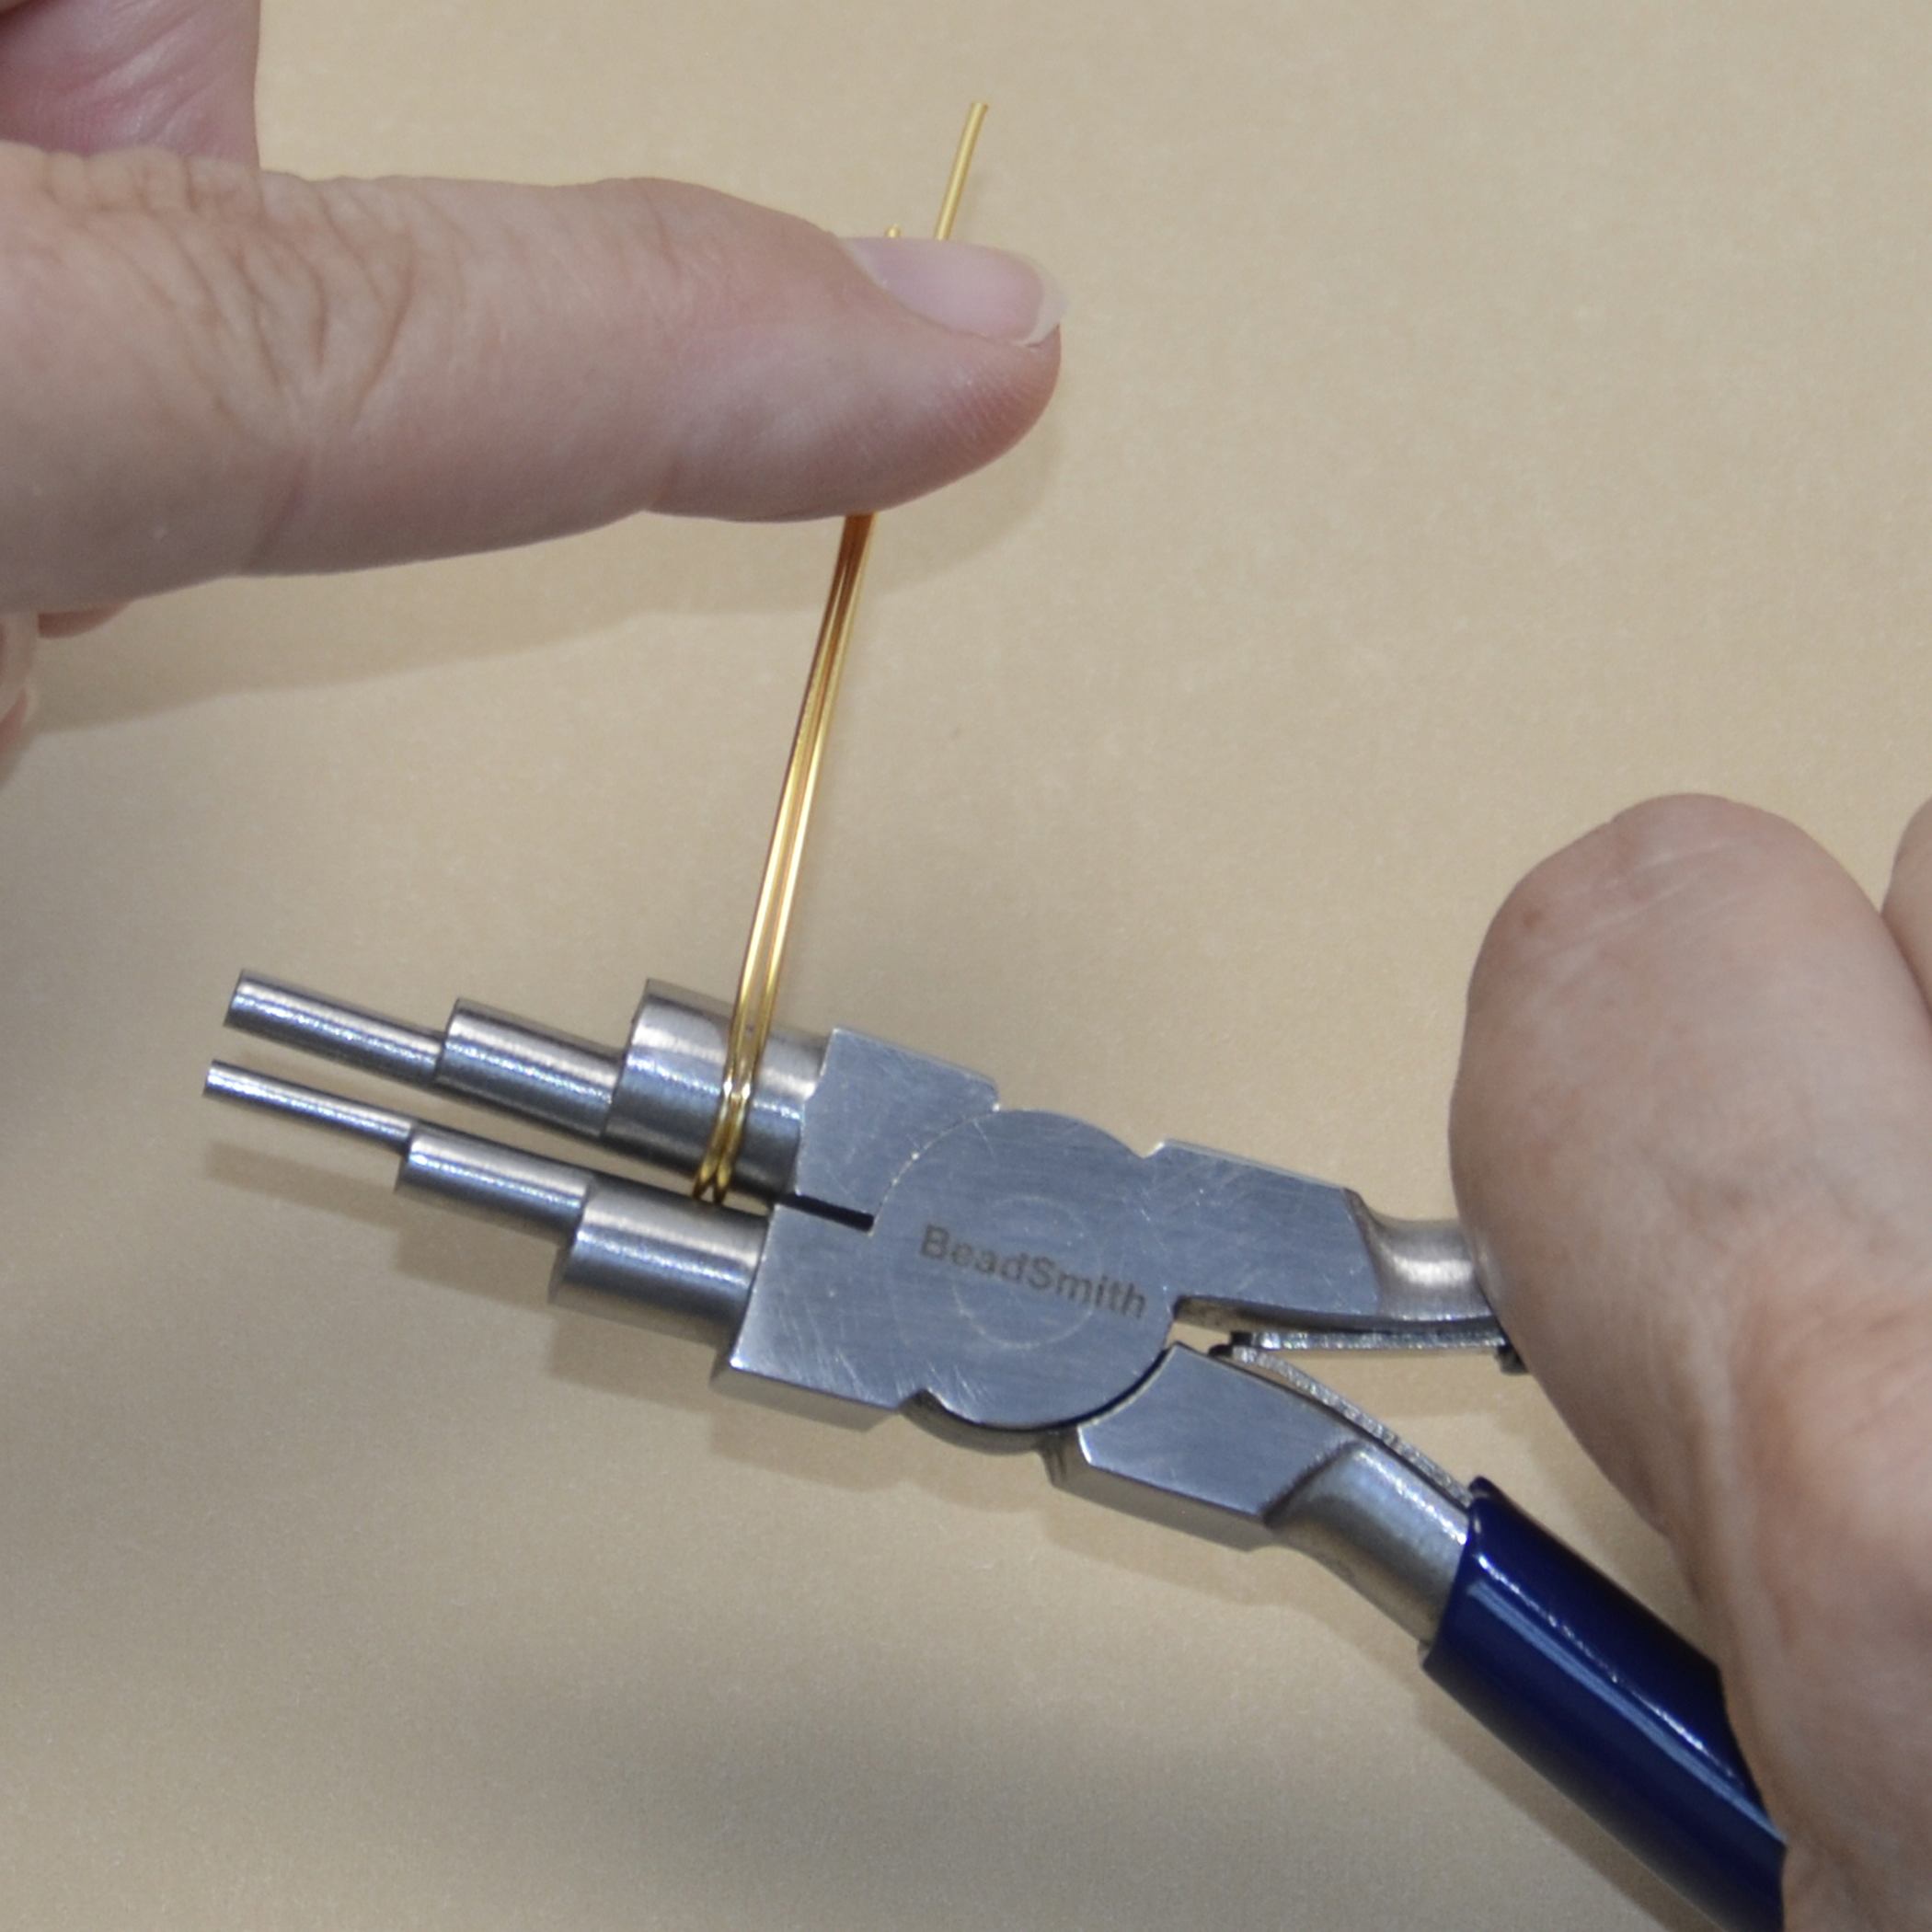
Making a loop with 6-step pliers is very similar to using round nose pliers.
Start by cutting and straightening your wire. Choose the step on the pliers that matches the size loop you want to create.
Insert the end of the wire between the jaws so the wire sits flush with the edge of the step. Hold the wire firmly with the pliers and rotate the pliers away from you. This wraps the wire around the cylindrical step and forms the loop.
Continue turning until the loop closes.
How to Make a Wrapped Loop with 6-Step Looping Pliers

If you are making a wrapped loop above a bead, bend the wire at a right angle above the bead first. Place the wire on the selected step, rotate the pliers to form the loop, and then wrap the remaining wire around the neck of the loop. You can even leave the loop on the jaws of the pliers while you wrap the neck under the loop.

Comments
Post a Comment