This St Petersburg stitch bead bracelet is like a holiday wreath for your wrist! Made with single St. Petersburg chain, the combination of colors gives it a Christmas holiday feel, but you can wear it all year long.
The beads accentuate the slightly asymmetrical nature of the stitch by alternating the color on each side between red and gold. Here's how to make your own.
For this bracelet design, you can use any combination of size 11 beads. To make one similar to mine, use size 11 Czech seed beads made by Precioso Ornela.
Czech beads work well for this project because the beads have rounded sides like donuts and look good stacked.
They are also slightly irregular which I think adds character to the overall design.
The colors I used on the ends of each beaded row are metallic gold and silver lined ruby red. The main body bead color is iris gold.
The bead thread is WildFire in green, which is a great neutral color that seems to work with most bead colors.
I have also made this bracelet using PowerPro 8lb Fishing Line in moss green. The PowerPro had some abrasion near the needle while stitching, but worked ok.
To make a finished 7-inch bracelet, you will need a piece of thread about 5 feet long (a full arm's length from fingertip to fingertip). Adjust the thread length according to your needs.
Add a red stop bead and leave a 6 inch thread tail. I finished my bracelet very simply by removing the thread around the stop bead, adding a jump ring in the first stitch, and weaving in the tail.
If you plan a different type of clasp, be sure to leave additional thread at the tail.
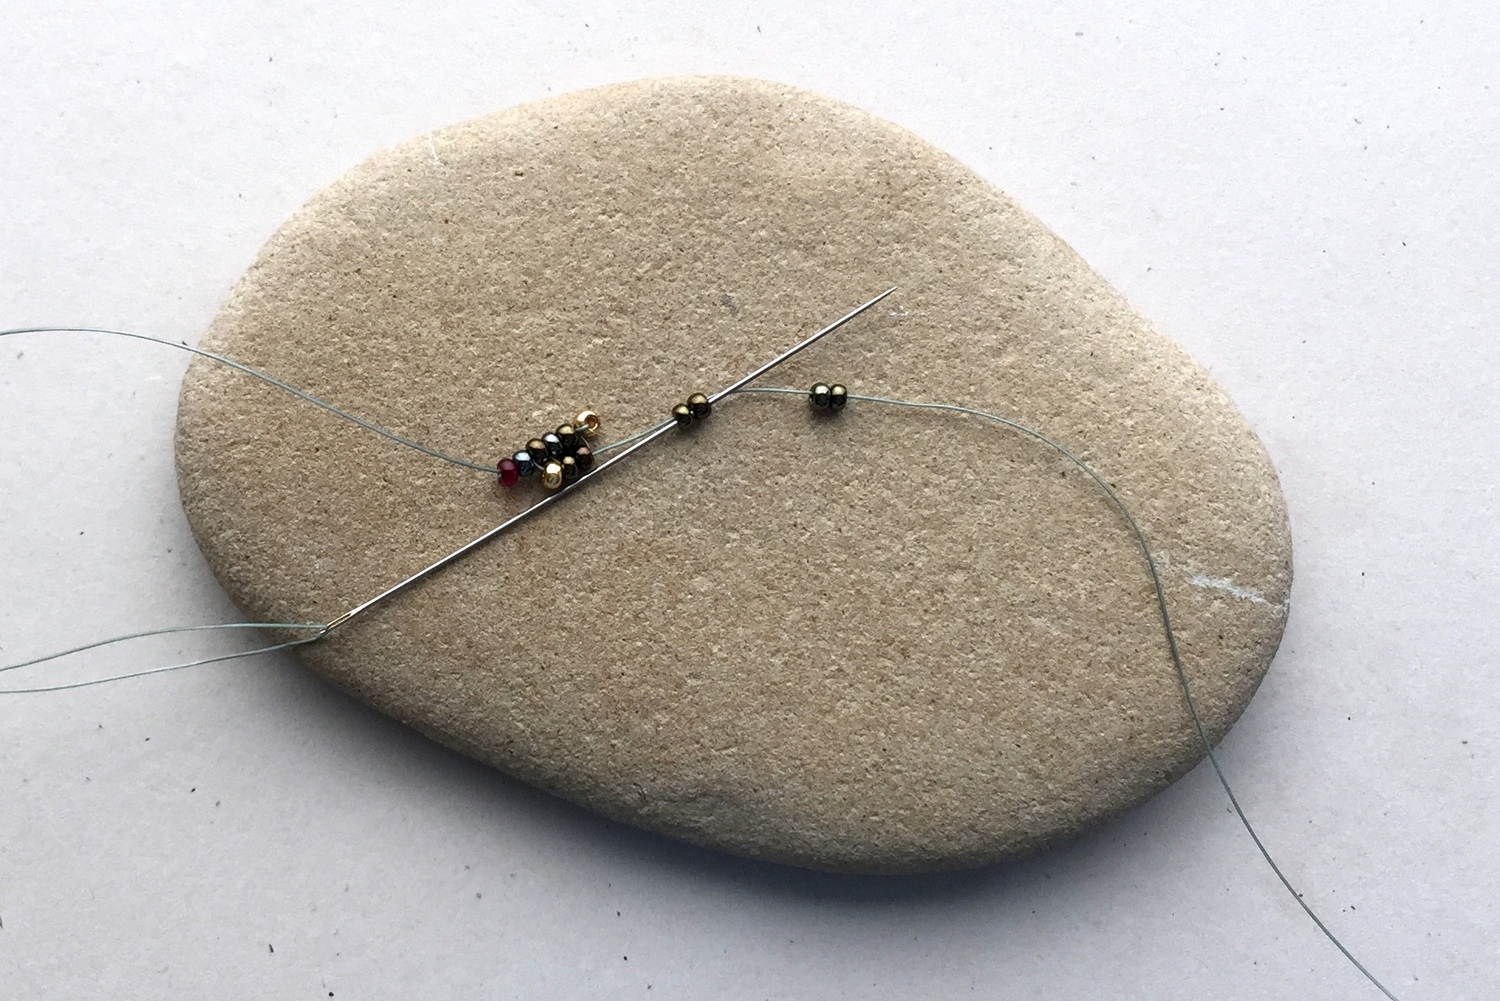
Pick up six iris gold beads and stitch back through the third and fourth beads.
Pull the thread taut to create a small circle with the four iris gold beads. Align the beads so they are stacked 2x2 on top and side by side.
Pick up a gold bead and stitch back through the previous 3 beads on the row.
The two bead stack sticking out are used to connect the second row to the first row of beadwork. Pick up a gold bead and stitch through the two beads.
Pull the thread tight after each stitch to maintain the beadwork tension and keep the beads aligned.
Pick up four more iris gold beads and slide them down.
You are going to stitch back through the first two beads of this group to make another 4 bead cluster.
For me, the easiest way to do this is to pinch those two beads between my fingers while I slide them down the thread. When I get to the other beads, I am holding them, ready to insert my needle and make the loop.
Believe it or not, it saves quite a bit of fumbling and trying to separate the beads to make the next stitch.
Pick up a red bead and stitch through the three iris gold beads below it in the row.
This completes the second row of the bracelet. It also leaves two beads that are going to be part of row 3 and attach the rows together.
Continue beading in this manner until your bracelet is long enough.
For a clasp, this bracelet uses a simple spring ring with an extender chain on the other side.
One of the hard things with beaded bracelets is that they are not easy to size, so this gives a little bit of room to adjust. Also, you can add a charm to the end of the extender chain.
When I stitched the last group of four beads, I added a closed jump ring to the group and then completed the row so there were no rows that weren't finished with red and gold beads on the end.
Stitch back through the beads and add half hitch knots to secure the thread. Trim the thread with a thread burner. I like the Berkley hot line cutter made for fishing better than the thread burners made for beadwork.
I didn't plan how I would finish the bracelet when I started (it's always good to think about this in advance), so I slipped a jump ring into the same spot of the beadwork on the starting side of the bracelet.
Then I removed the stop bead and stitched through those two beads, wove through the thread path to reinforce it and secured the thread with half hitch knots.
The closeup of the clasp should help you see the details.
Here's the finished Single St. Petersburg stitch bracelet in Christmas-y colors of red, gold and green!
What other colors do you think I should try? Let me know in the comments.
If you're feeling adventurous, you could also try to make a wreath.
This is a prototype design, but it was too floppy to use in a final jewelry design. However, you can do circular St. Petersburg stitch around a bead frame.
That's a topic for another day.
Want to know when I post new free projects and tutorials? The ONLY reliable way is to sign up for my new email newsletter.
You can sign up by providing your email and you will be notified of new blog posts plus special offers. Be sure to reply to the email confirmation or you're sign up is incomplete (check your spam folder).


Comments
Post a Comment