Making these wire hoop earrings is a great beginner wire wrap jewelry making project.
This wire hoop DIY follows the current trend of smaller hoops that hug your ear (huggies). I saw a pair of coiled hoop earrings similar to these during my recent shopping trip at the mall, so of course, I decided I needed to make a pair for myself.
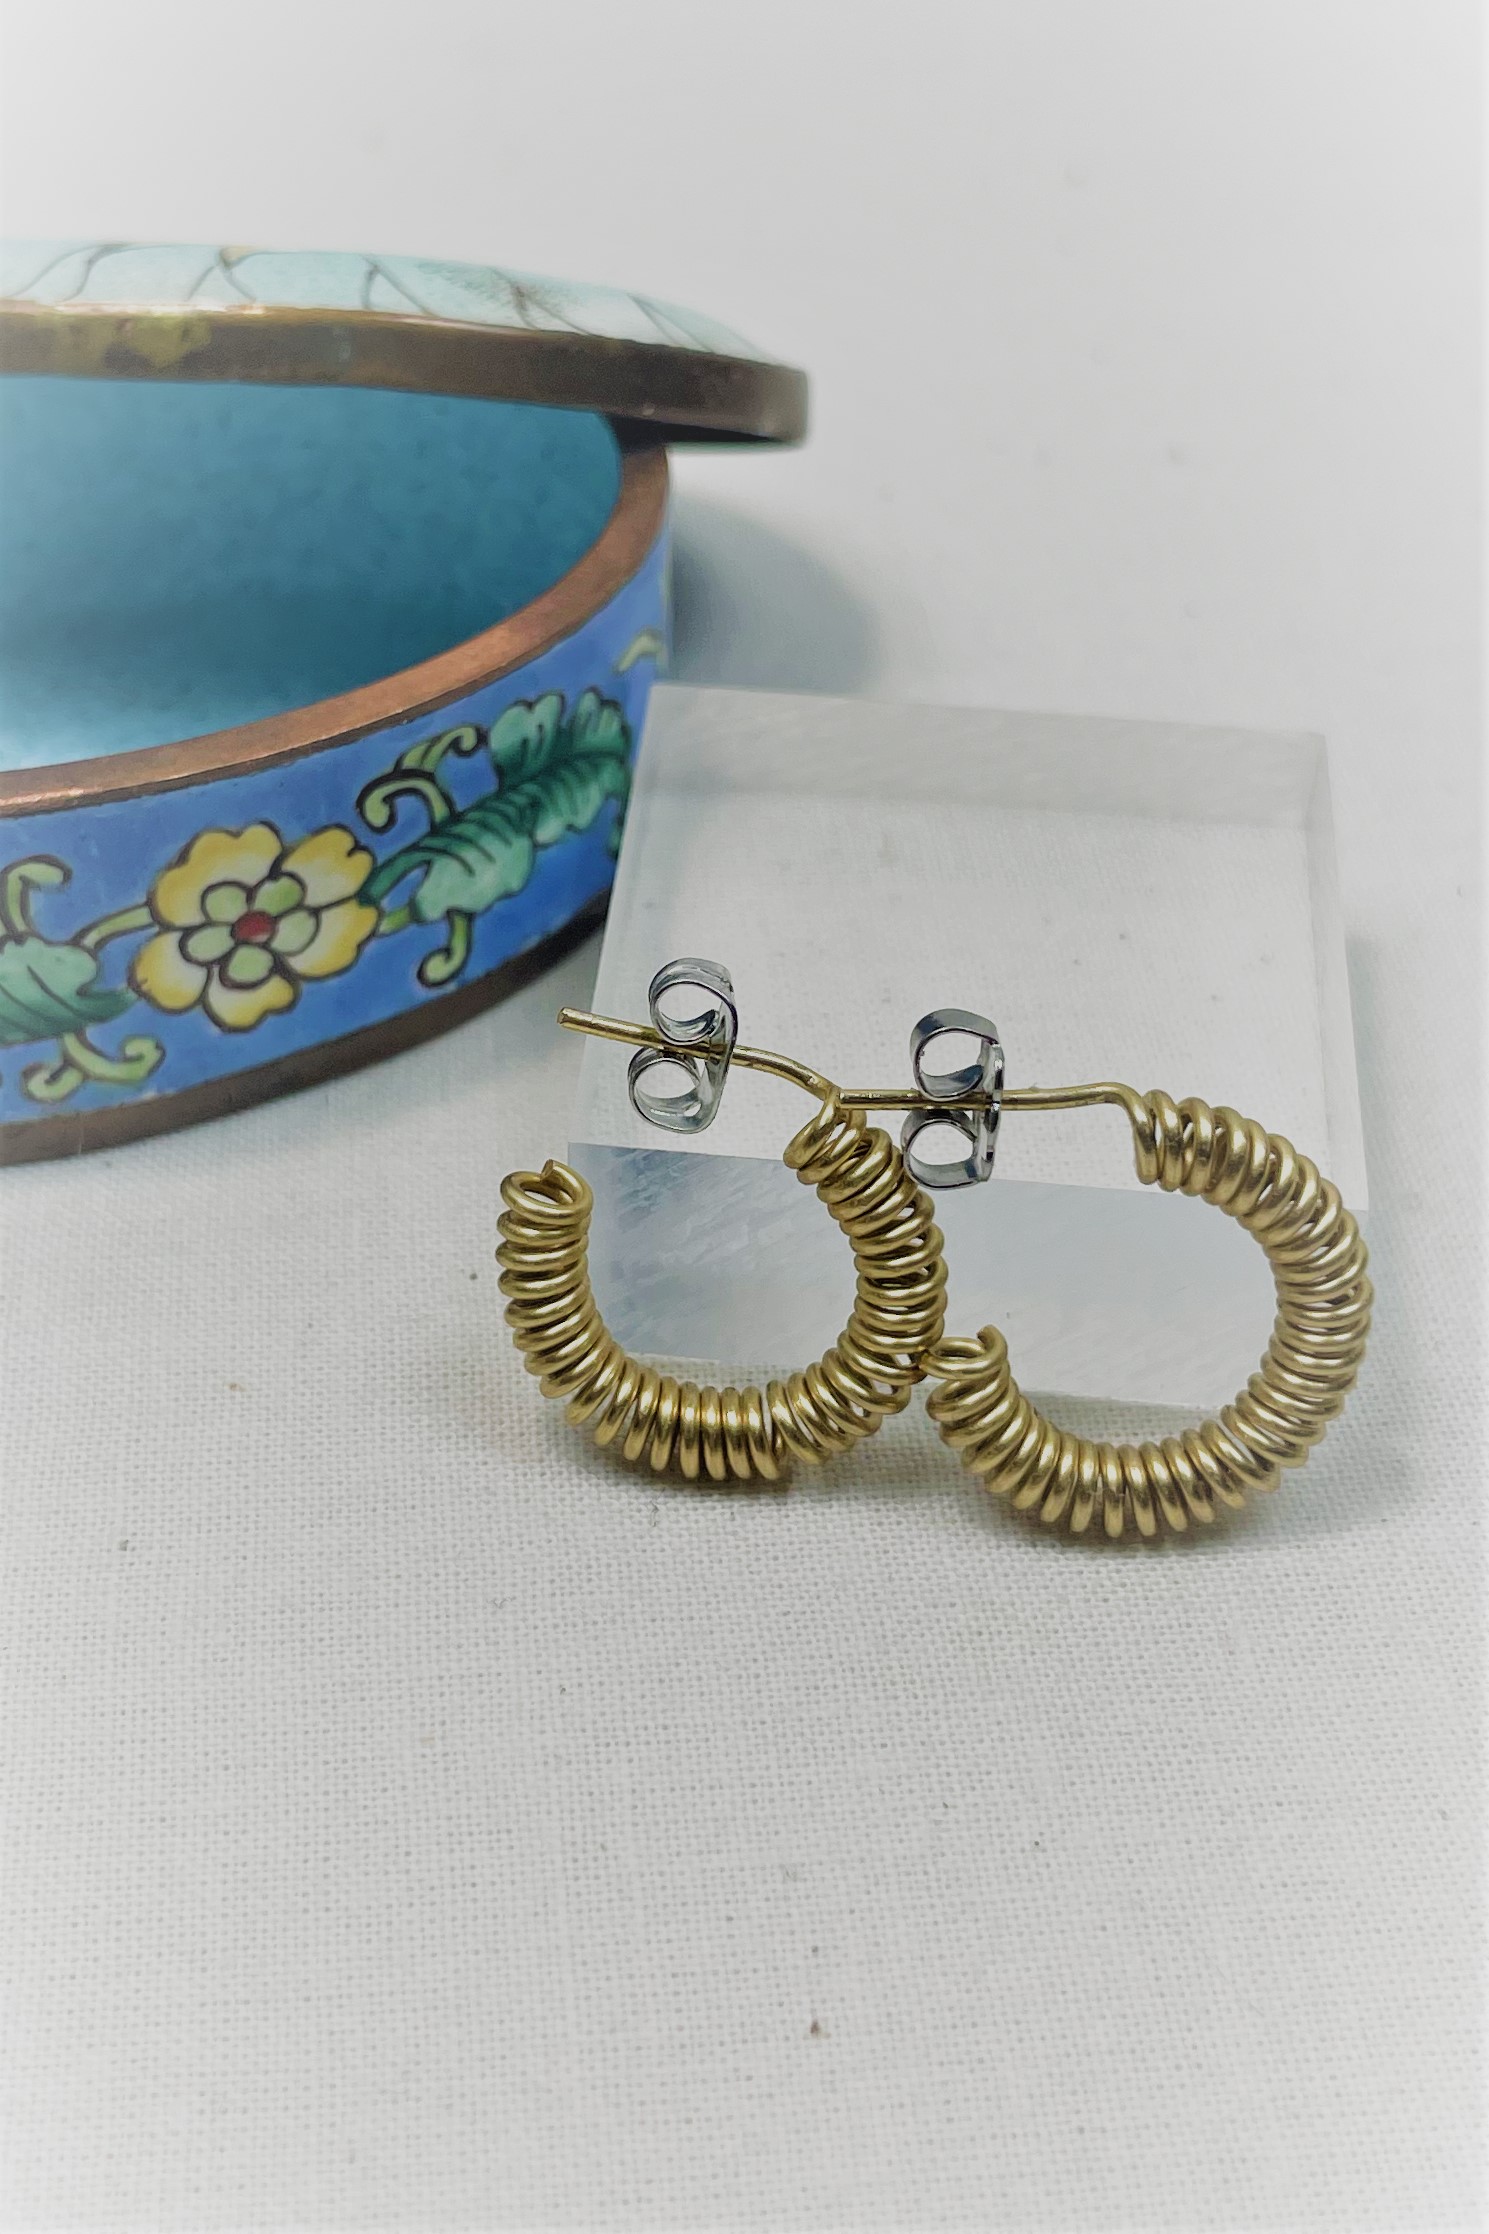
The materials and tools are super simple and they will take less than an hour to make from start to finish. My finished hoops are a little less than 3/4 of an inch in diameter. Perfect for everyday wear.
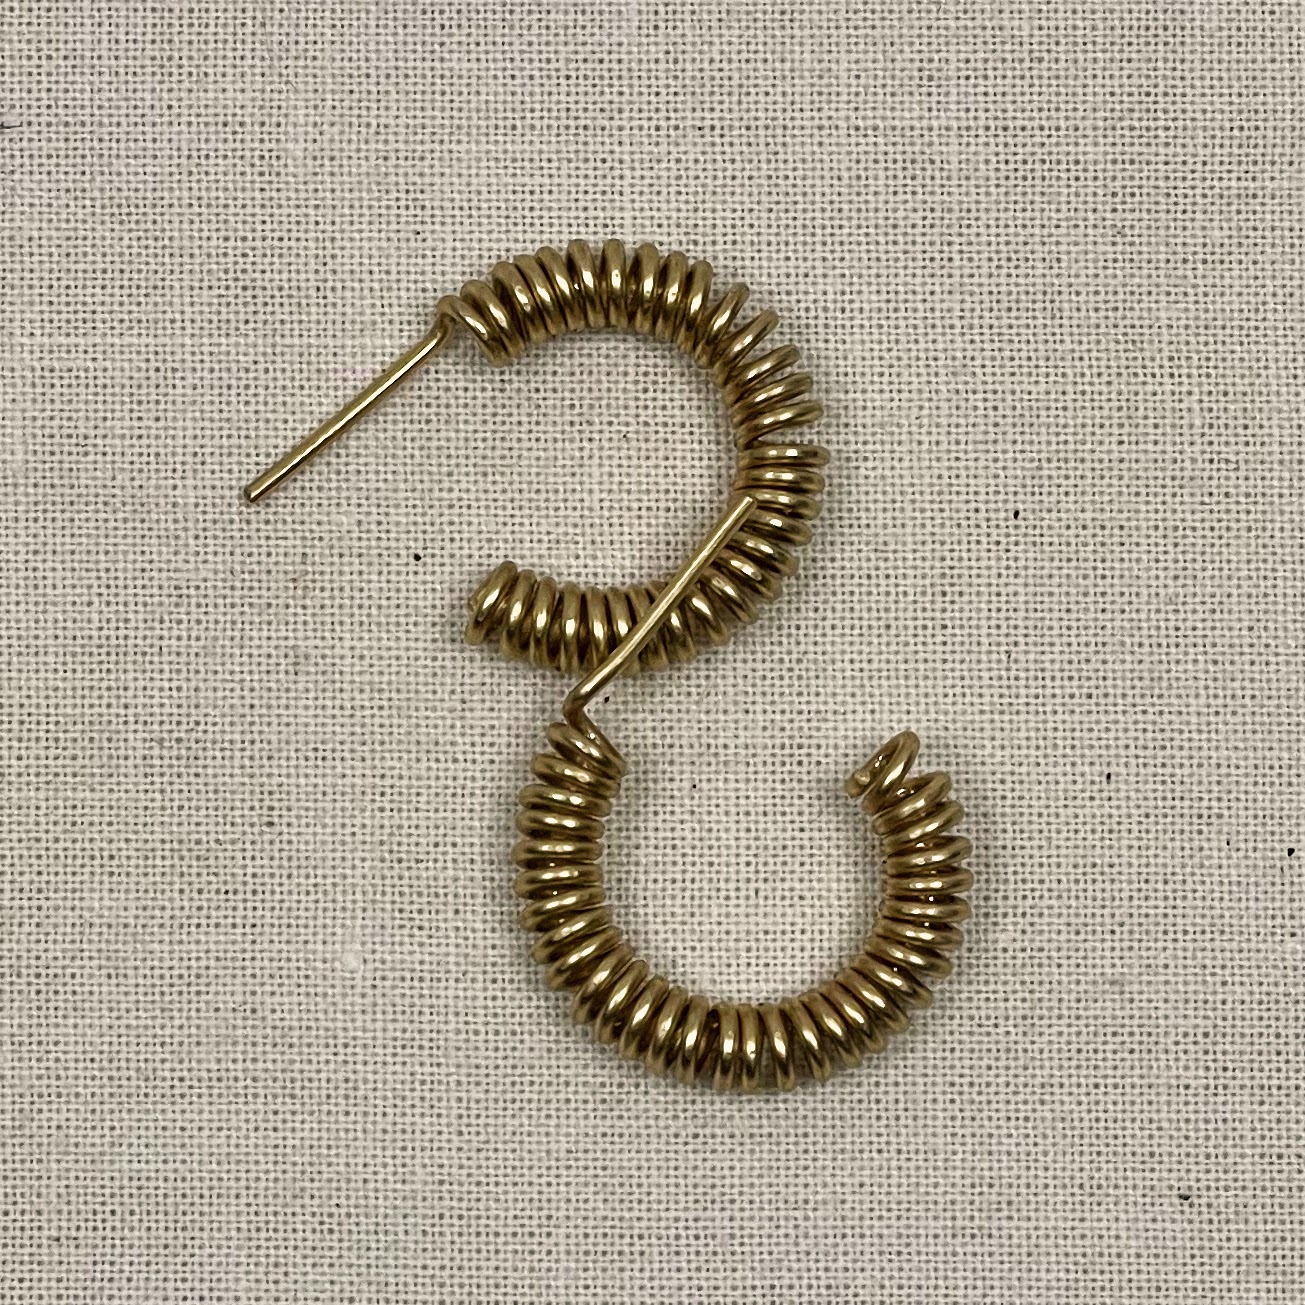
The hoops are made with a single piece of 20 gauge wire that is made into a tight wire coil and then shaped around a round mandrel.
You will need the following tools and supplies (the links in this section only are affiliate links to Amazon. If you make a purchase using them, I will receive a small commission at no cost to you):
It's interesting that I used Artistic Wire for this project, but I just got done writing a
review of ParaWire and I was out of 20 gauge wire, so I thought I would try something new.
Start by straightening and cutting the (2) twelve inch pieces of wire. Straighten the wire before cutting it from the spool by running it between your fingers with a polishing cloth and applying pressure to remove bends.
Grasp the wire with the six step pliers about 3/4 of an inch away from one end. This is where you will start the coiling the long end of the wire. The smaller piece is going to be the wire earring post.
Coil the wire around the smallest barrel of the six step pliers (2mm). Make sure the wrapping wire is closest to your hand and not on the outside or you will run out of room on the barrel to make the coil.
If you are coiling the wrong way, you can always remove the coil and flip it around. I just find it easier to start off on the right foot.
As you are coiling, you will need to open the plier jaws and move the wire for the earring post to the other side.
Continue coiling until you have used all of the wire, except for the piece set aside for the post).
The very last part of the tail is difficult to wrap, so get as close as you can and then trim off the straight part on the end of the wire.
Using the flat nose or chain nose pliers, grasp the wire as close to the coil as possible. You may need to use your fingernail to separate the coils a little bit.
Bend the wire post at a 90 degree angle so the wire can be used as a post for the earring.
Use the plastic step mandrel to shape the coil into a circular hoop. This is the tricky part and takes patience. You will need to separate the coils slightly on the outside edge in order to elongate the section of coiled wire and to get a round hoop.
It also helps to start on the smaller steps and gradually move to the larger steps as you begin to get the desired hoop size and shape.
It is often the case that the two earrings come out a little different. In this case, the right hoop isn't as round and the post is not on the same angle.
To get them more into alignment, it can help to stack the two earrings and adjust the shape together at the same time. You will repeat the prior steps of wrapping around different steps on the mandrel and moving the coils apart slightly with your fingers.
When you are satisfied that the shape and size of the hoops is close enough, trim the hoop posts to approximately 3/8 of an inch long. You can make the posts long or shorter to make them more comfortable for you to wear. Most commercial earrings have a 3/8 inch earring post, so that is what I use.
You can leave it a little bit longer since you will need to file the wire end smooth using a file or emory board.
Be sure to file the cut end on the other side of the coil too. It doesn't go in your ear, but it can still catch on clothing or scratch.
And now for the best part - trying them on and wearing them! A standard earring back will fit 20 gauge wire or you can use the plastic ones. (Not my best selfie face, but I'll work on it)
Maybe we should just go to the close up shot.
Once you've got the hang of this, you can experiment with different sizes of coils and hoops. Larger coils are more flexible and larger hoops will take more wire - so adjust accordingly.
Have you made hoops like these before? How would you change them to make them your own? Let me know in the comments.


Comments
Post a Comment