One of the simplest ways to embellish wire is to add beads - either by adding beads directly onto the wire shape or by wrapping beads around the wire.


This is the same basic frame without the swirl at the bottom and using 6/0 E beads.

And these channel set garnet bead earrings is one more project that use the same wrapping technique - but this time between two wires.
Click on the link to see the ways you can stay in the loop!

Today, I'll show you one of the ways that I add beads to the outside of a wire frame like I did with this mixed metal wire heart pendant.
The first thing that you will need is some sort of a wire frame to attach the beads to. I have a free tutorial to make heart shape wire frames, but I also have a large selection of frames that I bought too.
One of the most important things to know about this technique is how versatile it is.
It works with any size and type of bead that you can fit your wrap wire through once and snug to the frame without it breaking.
Materials:
18g Wire frame
Beads
Thinner wire to attach the beads
Crochet hood or similar tool
If you would like a heart frame like mine, use this free heart wire frame tutorial to make one. I added a swirl at the bottom of the heart so I could hang a bead, but the basic shaping technique is the same. Just start with a longer piece of wire to have enough to add the swirl.
I used Miyuki 8/0 beads on the edge and 26g copper wire to wrap the beads.

Start by securing your wire to the frame by wrapping it two or three times. I typically do this in a corner where it will be less obvious.

You can start the wraps loosely, but then smoosh them tightly together before you start adding beads.

Bring the wrap wire to the top of your frame, add a bead and push it against the frame however you would like it to lay. You may need to put a little bend in the wire to get it to sit the way you want.

Pull the wrap wire through the frame and wrap it at least once around the frame to secure it. I use a crochet hook or similar long thin tool to help me grasp the wire and pull it through. You don't need the hook of the crochet needle, just something to help grasp the wire.
Some people feed the end of the wire through the center, but when I am working with a long piece of wire, I find that makes my wraps on the frame less tight and just takes longer. Find what works for you.

Once I've pulled the wire through, I made a full wrap before adding another bead and snugging it to the frame. Then I wrap the same number of times around the frame, using the crochet hook to help me pull the wire through the frame.

Depending on how you like your beads facing, you may need to use a piece of wire to help you straighten them and keep them even on the frame. Anything firm that fits in the bead will work. I also use an old bead reamer to help hold the bead in place. (See the brass wire on the right inserted in the bead hole? I am using that to turn the bead.)

Keep adding beads and wrapping.

Getting to the middle can be a little tricky. I always try to center a bead there, but you could also just wrap without a bead and form a wire bridge where you could add a jump ring for hanging the pendant.
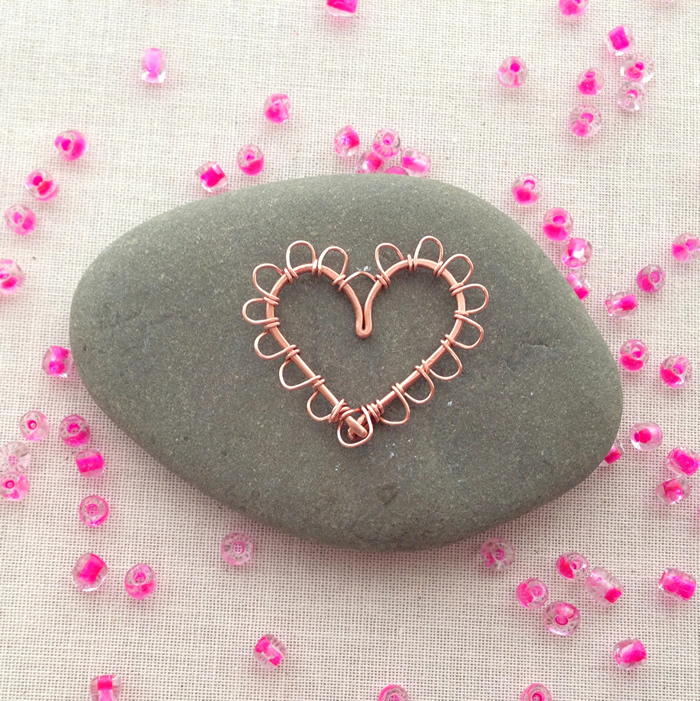
This lacy heart shows an example of a wire bridge in the center. Note that this is the same wrapping technique, without the beads. A tutorial for making the lacy scalloped wire wrap edge can be found at the link..
When you get all the way around the frame, secure the end wire with at least three wraps the way you started. I also try to wrap around the starting wire once to secure the ends better.
Trim the wire ends and press them flat with pliers. Rub your finger over the area to make sure the wire ends won't get caught on skin or clothing.
Trim the wire ends and press them flat with pliers. Rub your finger over the area to make sure the wire ends won't get caught on skin or clothing.

To finish my heart, I added a jump ring to hang it from and a copper chain with a handmade clasp. I have a free tutorial to make a hook clasp. I also used a headpin to attach a silver crystal dangle.
And there's MORE
Several interesting notes about this technique.
It can be used to attach beads to the outside edge of a frame, like I have done, or the front or back of the frame, by simply shifting the position of the bead when you secure the wire.
You can also change the look of the finished piece by twisting your beads slightly. For example, in this heart piece, I didn't want the bead holes to show, so I held them in place square on the edge to keep them from turning. Allowing the beads to turn slightly would result in a slightly different look.
You can alternate the bead types and size and make more of a star burst pattern by alternating large beads with small beads.

This is the same basic frame without the swirl at the bottom and using 6/0 E beads.
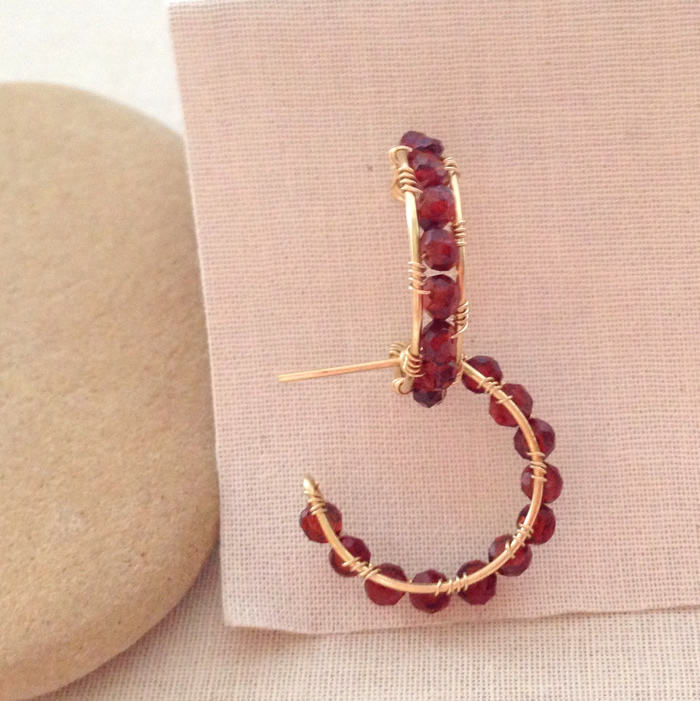
And these channel set garnet bead earrings is one more project that use the same wrapping technique - but this time between two wires.
Please consider visiting my sign up page to get notified when I publish new projects and tutorials. I don't post on a regular schedule, so you could be missing out!
Click on the link to see the ways you can stay in the loop!
Comments
Lauretta
Thank you so much for posting this project.
I like the looks of it and it is a great project to get my feet wet with.
Post a Comment