It's no secret that herringbone weave is one of my all time favorites. I'm always looking for new ways to incorporate it into my wire wrap jewelry. This time, I decided to try using herringbone style wire wrapping to surround some glass beads and embellish simple copper hoops. This is the first time I've tried wrapping
multiple beads using a herringbone style wrap.

 Like most of my jewelry, they were pretty easy to make.
First, I cut two pieces of 20g copper wire to the length necessary to make the size hoops I wanted. My hoops are 1 inch in diameter, so each of my hoop wires started about 3 inches long.
It helps to remember some of your basic geometry when you are making hoops. The formula to figure out the circumference or a circle is the diameter multiplied by pi - which in my case is 1 * 3.14. I was proud to tell my kids that I actually used my high school geometry knowledge to make these - because until now I'm not sure I've had much use for it.
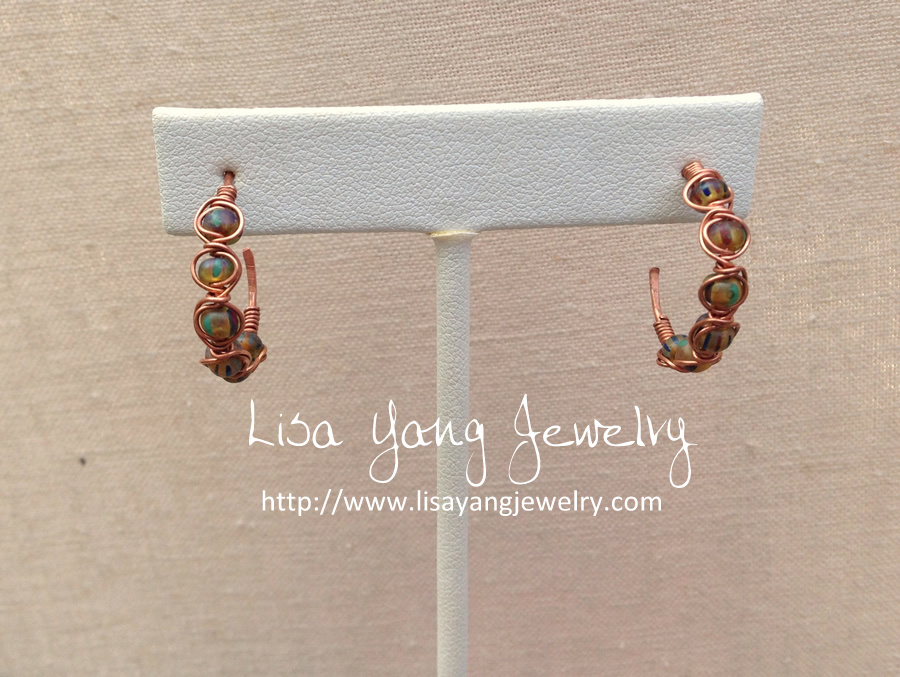
You will need beads that fit on the 20g wire used for the hoop. I used Transparent Ghost Picasso Stripe beads from A Grain of Sand in size 6/0. The stripes are very subtle, even if these pictures make them look a little bright. I think they have the shimmery look of old roman glass.It's hard to guess how many beads you'll need until you start wrapping.
 To wrap the beads, I used 24g copper wire. I typically start with about 12 inches of wire - but in this case that was barely enough, so I recommend you start with a little more. I started about half an inch from the end of the wire and made about 5 wraps to form a small coil. Then I slid one bead up to the coil. I wrapped around the bead using a herringbone weave. It is one full wrap around the bead, and then another wrap down one side of the bead so the wrap wire continues to go down, ready to wrap the next bead.
 I continued this way, using a herringbone style wrap until I had as many beads as I thought I needed. In my case, it was 6 beads. Then I coiled the wire around the hoop wire about 5 times to end the earring. At this point you can still move the wrapped beads on the hoop wire to position them where you want. I made a paddle on one side of each of the hoop wires, and then slid the wrapped beads down towards that end.
Now the hard part, wrapping the wire around a mandrel to make the hoop shape. It's a little challenging because it's no longer a smooth even wire because of the wraps. It just took a little tweaking to get the shape right.
I think you could make the hoop and then wrap the beads, but I haven't tried it yet. Once the hoop was made, I trimmed the post that goes into your ear to the right size. For me, that's about 3/8 of an inch and used a cup burr to smooth the end. I hope you like your earrings as much as I like mine!
Now the age old question - to patina or leave them shiny and let them age... Any opinions?
Comments
Post a Comment