Updated: June 2025
Create Heart-Shaped Wire Frames for Beading or Wrapping
Wire heart frames are a beautiful and versatile base for many jewelry designs. Whether you want to wrap beads, create a pendant, or make linked charms, these wire hearts are a perfect starting point. This tutorial shows you how to shape a symmetrical wire heart using simple tools and techniques. It is a perfect project for beginners.
Materials Needed
Wire
- 18 gauge copper wire (any craft wire, like ParaWire, will work)
- use 16 gauge if you want a thicker, stand alone charm
Tools
- Round mandrel or round bail-making step pliers
- Chain nose or square nose pliers
- Wire cutters
- Marker (for marking the wire)
- Optional: printed heart template
Tip: I recommend six-step bail-making pliers for consistent loops, especially if you're a beginner.
Tip: I recommend six-step bail-making pliers for consistent loops, especially if you're a beginner.
Step-by-Step: How to Make a Wire Heart
Step 1: Begin by creating a heart-shaped template on paper to use as a guide while shaping your wire.
Using a template makes it much easier to achieve consistent proportions and the correct size for your finished jewelry piece.
I traced both the inside and outside of an existing heart frame to help guide the shape and size precisely. You can also print a heart image from the internet to use as a template.
Step 2: Start Shaping the Wire
Use your round pliers or mandrel to form a U shape in the wire.
The 7 mm barrel of my step pliers provide the perfect size curve when I compared it to the sample heart frame and my template. Using a little over 3 inches of 18 gauge wire, make the top curve of the heart using your pliers or mandrel.
Step 3: Mark and Bend the Center Angle
Using chain nose or square nose pliers, bend the wire sharply at the mark to form the inner point at the top of the heart.
Step 4: Bring the Wires Together to form the Center of the Heart Shape
Use chain nose pliers to gently push the two sides of the wire together until they meet. This helps define the center and creates the heart’s cleft.
Compare the shape to your paper template. You may need to slightly separate and adjust the center to keep the wire balanced before forming the second lobe.
After adjusting, use the same mandrel or step pliers to form the second loop. Tuck your pliers into the center bend and curve the wire to match the first side.
Verify the heart shape against your template.
Once you're happy with the heart shape:
-
Trim the shorter wire so it’s flush with the longer one.
-
Wrap the longer wire end over the cut wire to secure the heart shape.
This forms a clean, closed frame you can use as-is or embellish further.
I flatten the part of the wire that will be wrapped over by “smooshing” it in the jaws of my flat nose pliers (yes, that’s the technical term!). To get a good smoosh, position the wire close to the hinge of the pliers—where the most pressure is applied.
I recommend using your older or less-precise pliers for this, since applying that much pressure can loosen the hinge over time. This step isn’t strictly necessary, but flattening the wire helps it fold more neatly and stay in place during the final wrap.
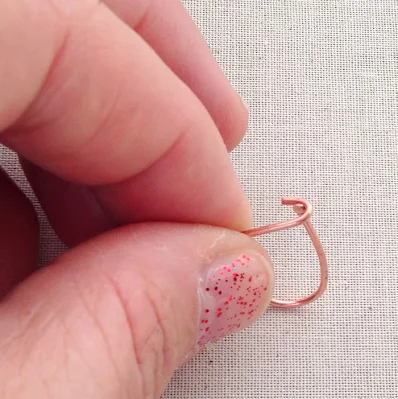
Bend the wire tail around the trimmed and flattened section, then cut it just long enough to securely hold the first wire in place.
Use your chain nose pliers to press the wire loop flat, then adjust the wires as needed so everything is neat and aligned to your liking.
To strengthen your wire heart frame, you can gently hammer it to both flatten and work harden the wire. If you have a rotary tumbler, you can also use that to polish and work harden the shape. Tumbling is optional, but it’s an efficient way to finish multiple wire frames at once.
Work hardening helps the frame maintain its shape, so using either method—hammering or tumbling—is recommended for a more durable piece.
When the wire heart frame is done, you can put it directly on a chain to see how it hangs.
You can also add a jump ring to the heart shape and add it to the chain that way.
Wire Heart Pendant Ideas
Customize Your Heart Frame
Once your heart is shaped and secured, you can:
Wrap beads along the wire with thinner wire
Weave beads across the frame using thread
-
Add dangles, charms, or use it as a pendant base
You may also enjoy this free tutorial on how to make a wire heart clasp.
This heart pendant is one of my all-time favorite jewelry designs!
You’ll start by making the heart frame just as shown in this tutorial—but instead of folding the second wire end over, shape it into a decorative spiral. Then, follow this tutorial to wrap beads onto the heart using wire. It’s simple, and the result is so pretty!
Love free DIY jewelry projects?
Be sure to follow me on social media, including Facebook and Pinterest, for more ideas. You can also sign up to get new tutorials by email—visit my Social Media & Contact page for all the ways to stay in touch.
updated 6/13/2025


Comments
Post a Comment