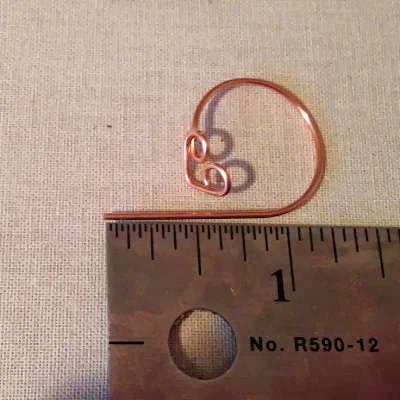
I hope you enjoy this free tutorial to make a simple heart shaped wire ring.
It's perfect for Valentine's Day and great practice for learning to perfect making simple wire loops.
Here are the supplies you need:
Ring mandrel (a nail polish cap, marker or similar round item can be used)
File or emery board
Ready, set, go...
1. Cut and straighten a five inch piece of wire and smooth the ends with a file or emery board.
2. Make a simple loop on the end of the wire. Using your round nose pliers, grasp the wire about 1/2 inch from the first loop. Wrap both ends of the wire around the barrel to form a loop in the middle of the wire.
3. Using your chain nose pliers, grasp the wire so one edge of the pliers is in the middle between the two loops. Bend the loops towards each other creating a sharp angle.
4. You should now have a heart shape at the end of the wire. For the next steps, make sure the long wire is on the bottom or inside of the ring.
5. Using your round nose pliers, adjust the angle of the wire so it is coming straight from the middle of the loop instead of pointing up (compare the pictures in step 4 and 5). This wire will be used to make the ring.
6. Wrap the ring around your mandrel and trim the end of the wire to less than 1/2 inch past the heart shape. I usually trim this wire to 3/8 inch before I fold it down but for now a little extra is fine.
7. Insert the wire end through the loop. This is hard to do without distorting the ring shape, so bend it slowly and carefully.
8. Adjust the size of your ring using a mandrel and pull the wire end to tighten. Be careful not to pull to tightly or the loops forming the heart will separate. They can be pushed back together, but will make the ring smaller when you do so. Trim the wire end so it will be hidden between your fingers when you are wearing the ring.
9. This is the simplest way I have found to finish the ring. Using the part of your chain nose pliers closest to the joint, squeeze the bottom 1/8 inch of the wire end to flatten it. Then smooth it using your emery board or file.
10. Squeeze the flattened section of wire so it is pressed against the ring shank. The shadow in the picture below gives you a really good idea of the way the wire is pressed to the ring band.
11. Make any necessary adjustments to finish your ring. I usually put the tips of my round nose pliers in the loops of the heart and gently squeeze them together.
For a slightly daintier ring, you can use 20g wire - but you will really need a tumbler to harden the wire and prevent the ring from bending out of shape. Or you could hammer it lightly on a steel bench block or anvil.
If you are familiar with making a wrapped loop, you can use that to secure the wire end in steps 8 and 9 - but it is more difficult to make a neat loop than it is to flatten the wire end and squeeze it to the ring shank.
I hope this was easy to follow and you can make lots of heart rings for your friends and family! Click here to see my other heart jewelry projects.
Please follow me and you will find it easier to know when I've posed new free projects.
By liking my page on Facebook: Lisa Yang Jewelry on Facebook
By email: You can sign up by providing your email and you will be notified of new blog posts plus special offers.
By following me on Pinterest: Lisa Yang Jewelry on Pinterest
By subscribing on YouTube: Lisa Yang Jewelry on YouTube
And Instagram: @lisayangjewelry


Awesome simplicity"
ReplyDeleteI have not yet made a ring but your instructions make it seem doable. Thank you.
ReplyDeleteI just did it for my wife. It is my first try. It is beautiful. Thanks a lot.
ReplyDelete