
A little more luck...
This time, it is lucky horseshoe stud earrings.
I've never made stud earrings before, but this simple wire shape seems like a perfect place to start.
The best thing about this project? It only takes about 2 inches of wire so you can make plenty of them right from your scrap bin!
Making these earrings doesn't take much wire or time, but it probably works best if you have a pair of step pliers or bail making pliers to make the horseshoe shape even.
I shaped the wire for both earrings at the same time. Saves time and helps to make the shapes even. This isn't really possible using standard round nose pliers.
What is the difference between bail making pliers and step pliers?
 Bail making pliers (pictured)
have two round barrels of differing sizes. Step pliers (also called wrap n taps) have multiple steps of different sized barrels on one nose of the pliers. There are pros and cons to each one.
Bail making pliers (pictured)
have two round barrels of differing sizes. Step pliers (also called wrap n taps) have multiple steps of different sized barrels on one nose of the pliers. There are pros and cons to each one. Bail making pliers work well for making jump rings or coils, when you need to make something with multiple turns at the same size. Step pliers give you more size options on one tool - at least 3 and sometimes many more like this pair of 6 step pliers.
Lucky horseshoe stud earrings
Materials:
18g or 20g wire - about 2 inches. 18g makes an earring with a thick ear wire and may not fit all piercings.
Tools:
Bail making pliers, Step pliers or Round nose pliers
Chain nose pliers
Chasing hammer
Mini anvil or steel block
File, cup burr or emery board to smooth wire ends

Cut two pieces of 20g wire, about 3 cm, or just over an inch long.

Grasp the wire with your step pliers or bail making pliers so that a little bit of wire (2mm) extends over the edge. I am using a 5mm diameter step plier.

Here is another view of the wires before being wrapped around the barrel.

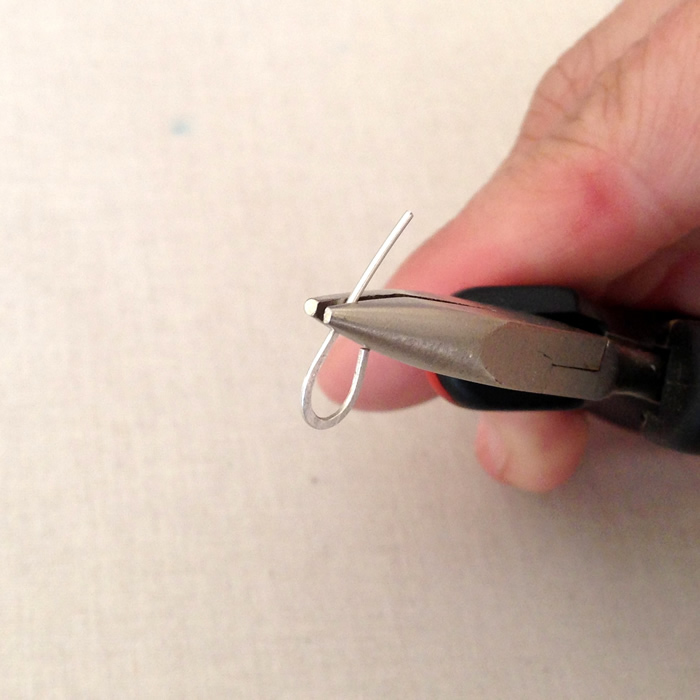
Using your fingers, push the wire tight against the barrel. Wrap both wires around the jaw of the pliers evenly together.

The side view shows how even both of the shapes are. I tend to bring the ends of the wire a little closer than I want them to be. They will spread a little when you hammer the curve.

Remove the wire from the pliers and adjust them if necessary.

Hammer the horseshoe hook of the wire.
The shape will spread slightly when hammered. Do your best to hammer the entire horseshoe shape without flattening the longer end of the wire. Use that to hold the wire shape on the block. The extra wire will be bent back to make the ear wire post.

After both wires have been hammered, you can file the ends as needed and adjust them so they stay even.
To make the earring post, you bend the long wire back. The spot where you bend it should align with the top of the horseshoe on the other side.
You are safer making the bend a little lower than the end than making it above the end of the wire.
If your bend makes the other side of the horseshoe too long, you can always trim the wire to even up the sides.
If your bend makes the side of the horseshoe with the post too long, your horseshoe will be lopsided and you can't really fix it.

Bend the wire ninety degrees. I usually trim my post earwires to 3/8 inch long. Make sure you file the ends or use a cup burr to smooth the edges.

My completed earrings with backs.

I made a few extra single earrings for practice because these are a perfect size for second or third piercings.
Did you notice I was brave and used sterling silver and gold-filled wire today? I guess I can afford to when it comes from the scrap bin - lol.
Comments
Post a Comment