Crimping, my Style
Crimping is my nemesis. Sometimes I get the hang of it, but it's always hit and miss, and that's never a good feeling when you're making jewelry. But, that doesn't stop me from using my Bead Crimp Tool... for other things!!

One thing I love to use it for is to make paddle head pins. They are so easy with this tool! Today, I'll show you how I make and use paddle pins made with my crimp tool.
Before I jump into the tool and how to make them, you might wonder why I even bother making paddle pins. Head pins are readily available and inexpensive.
There are two reasons I make them. First, it's cheaper and I can use almost any gauge and length of wire. I have a wide assortment of headpins, but I don't always have (can't find) the metal and gauge I need.
The second reason is that sometimes I just think they are prettier. They add a hint of sparkle that headpins just don't have.
And actually - there is a third reason, but it's probably the really strange one. It's that by making your own paddle pins this way allows you to change the order you do things - and sometimes that's a really good thing. So instead of stacking beads on a head pin and making a loop closure, I can make a loop closure, stack beads and then add the paddle.
Another reason it's good to make them this way popped into my head. You don't waste any wire doing it this way! Normally you cut a large portion of the end of every headpin after making the loops. This way - there is almost no waste becauase you are working from a large piece of wire and cutting off only what you need. Wow! That's a good thing!

This is my crimp tool. As I might have mentioned, I really hate it. I think I'd like to have this Om Tara Dual Crimper instead, and then I would still use the old one to make paddle pins anyway.
Update 1: I just ordered the Om Tara one because I really need to get over my crimp issues - so hopefully that will do the trick. I've heard the Om Tara are much easier to use and the crimp is secure (my biggest fear)..
Update 2: I have received and used my new Om Tara crimp pliers to make a fabulous triple strand moonstone bracelet. Can you say Heaven?!! It's so much easier!
Anyway - back to making paddle pins - the important thing is that your *crimp plier have flat surfaces at the front and back of the jaws of the plier. Those are the surfaces I used to make paddle pins.
* Don't try this with your good wire pliers. It will ruin them. See below for more info.

First, I put a piece of wire in the front flat area and squeeeze hard. I usually put the wire almost to the other side of the jaw - never sticking out on the other side.

After this first squeeze, you'll have a small flat area of wire. This isn't enough to hold a bead or anything else in place.

Round 2 with the crimp pliers - this time using the flat surface by the back of the jaws. This is where there's real power in a squeeze. Align the flat edge and squeeze the handles.

The results of the second squeeze make a small paddle. It's not always an even paddle, but you can always file it a little with an emory board.

There you go, the paddle pin is done, throw on a bead and... oops! It slides right off!
Yeah - I forgot to tell you that part. The only way these paddle pins work is when the wire is very close to the bead hole size. That means it can work really well with gemstones and pearls that frequently have smaller holes. These paddle pins do not work very well with glass beads with larger holes. But, you can always use a seed bead or smaller bead next to the paddle to make it hold.


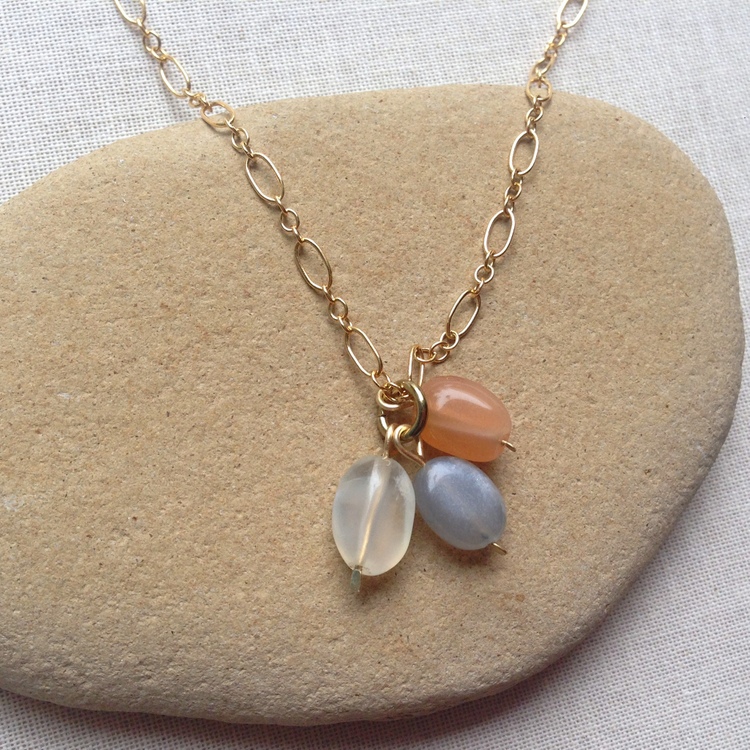
The nicest thing about making this moonstone cluster necklace is that I was able to take advantage of the best features of my other tools.
For example, the 1-Step Looper works great for making loops when the wire is empty - but it doesn't work as well when you are adding loops above a bead. See this post for some of my findings on the best uses for the 1-step looper.
By making the loops first, adding the bead and then using the crimper to make the paddle - I think the process was incredibly quick but also resulted in a nicer look overall - since the loops are close to the gemstones and there's a pretty paddle to catch the light (instead of a hidden head pin).
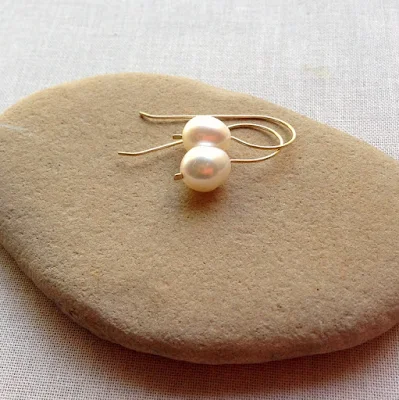
And here's one more project where I use the paddle pins made with my crimp tool - beautiful pearl earrings. The best part is that I can make them in 5 minutes - and they look great in lots of different gemstones and beads.

Another look at my simple pearl earrings. I'll post the step by step on how I make these soon, but they are a big seller for me at my holiday show. I use gold filled and sterling silver wire.
* You might wonder if you can use your other pliers to make paddle pins. I wouldn't. The crimp pliers are designed to smush metal and do it pretty well. I've done it with old pairs of my regular pliers and although it works, it also ruins the pliers by causing the jaws to no longer close securely.
On the other hand, I've done dozens of pair of earrings and dangles with my crimp tool - and it still works like crap as a crimper (it's really the user who's a crappy crimper) and great as a paddle pin maker. ;)
One thing I love to use it for is to make paddle head pins. They are so easy with this tool! Today, I'll show you how I make and use paddle pins made with my crimp tool.
Before I jump into the tool and how to make them, you might wonder why I even bother making paddle pins. Head pins are readily available and inexpensive.
There are two reasons I make them. First, it's cheaper and I can use almost any gauge and length of wire. I have a wide assortment of headpins, but I don't always have (can't find) the metal and gauge I need.
The second reason is that sometimes I just think they are prettier. They add a hint of sparkle that headpins just don't have.
And actually - there is a third reason, but it's probably the really strange one. It's that by making your own paddle pins this way allows you to change the order you do things - and sometimes that's a really good thing. So instead of stacking beads on a head pin and making a loop closure, I can make a loop closure, stack beads and then add the paddle.
Another reason it's good to make them this way popped into my head. You don't waste any wire doing it this way! Normally you cut a large portion of the end of every headpin after making the loops. This way - there is almost no waste becauase you are working from a large piece of wire and cutting off only what you need. Wow! That's a good thing!

This is my crimp tool. As I might have mentioned, I really hate it. I think I'd like to have this Om Tara Dual Crimper instead, and then I would still use the old one to make paddle pins anyway.
Update 1: I just ordered the Om Tara one because I really need to get over my crimp issues - so hopefully that will do the trick. I've heard the Om Tara are much easier to use and the crimp is secure (my biggest fear)..
Update 2: I have received and used my new Om Tara crimp pliers to make a fabulous triple strand moonstone bracelet. Can you say Heaven?!! It's so much easier!
Anyway - back to making paddle pins - the important thing is that your *crimp plier have flat surfaces at the front and back of the jaws of the plier. Those are the surfaces I used to make paddle pins.
* Don't try this with your good wire pliers. It will ruin them. See below for more info.

First, I put a piece of wire in the front flat area and squeeeze hard. I usually put the wire almost to the other side of the jaw - never sticking out on the other side.

After this first squeeze, you'll have a small flat area of wire. This isn't enough to hold a bead or anything else in place.

Round 2 with the crimp pliers - this time using the flat surface by the back of the jaws. This is where there's real power in a squeeze. Align the flat edge and squeeze the handles.

The results of the second squeeze make a small paddle. It's not always an even paddle, but you can always file it a little with an emory board.

There you go, the paddle pin is done, throw on a bead and... oops! It slides right off!
Yeah - I forgot to tell you that part. The only way these paddle pins work is when the wire is very close to the bead hole size. That means it can work really well with gemstones and pearls that frequently have smaller holes. These paddle pins do not work very well with glass beads with larger holes. But, you can always use a seed bead or smaller bead next to the paddle to make it hold.

If the wire won't go all the way through the bead (this happens to me frequently that the bead hole is much larger on one side than the other), use a bead reamer to gently enlarge the hole. I have a variety of bead reamers - some better than others. The diamond coated ones seem to work best.

For example, the 1-Step Looper works great for making loops when the wire is empty - but it doesn't work as well when you are adding loops above a bead. See this post for some of my findings on the best uses for the 1-step looper.
By making the loops first, adding the bead and then using the crimper to make the paddle - I think the process was incredibly quick but also resulted in a nicer look overall - since the loops are close to the gemstones and there's a pretty paddle to catch the light (instead of a hidden head pin).

And here's one more project where I use the paddle pins made with my crimp tool - beautiful pearl earrings. The best part is that I can make them in 5 minutes - and they look great in lots of different gemstones and beads.

Another look at my simple pearl earrings. I'll post the step by step on how I make these soon, but they are a big seller for me at my holiday show. I use gold filled and sterling silver wire.
* You might wonder if you can use your other pliers to make paddle pins. I wouldn't. The crimp pliers are designed to smush metal and do it pretty well. I've done it with old pairs of my regular pliers and although it works, it also ruins the pliers by causing the jaws to no longer close securely.
On the other hand, I've done dozens of pair of earrings and dangles with my crimp tool - and it still works like crap as a crimper (it's really the user who's a crappy crimper) and great as a paddle pin maker. ;)
Comments
B
If the hole is still larger than the paddle I try threading on a seed bead to see if that will prevent the bead from falling off.
Doing the happy dance here...
Post a Comment