
Bling, Bling... Hello?
My latest Ases-Style earrings is this pair of black and gold sparklers. A new pattern and color combination - as well as a new technique to hang the brick stitch components.
I'm feeling more confident with my brick stitch capabilities - and I hope it is showing. I'm trying to move beyond the simple rounds to drop shapes - either by changing the center bead from a round to a drop or adding different size beads on top of the round bead.
This is the largest pair of stitched earrings I have
made to date - almost 1 inch wide by 1 3/4 inches long including the ear wires.
made to date - almost 1 inch wide by 1 3/4 inches long including the ear wires.
From a materials perspective, I used black crystal glass center drop beads surrounded by 11/0 beads, then a round of Miyuki 1.8mm cube beads, and a final picot round of 8/0 and 11/0 beads.
I love, love, love the small cube beads. They snug next to each other perfectly in brick stitch and reflect the light beautifully.
Not hanging by a thread
What I'm most pleased with is a new technique I've discovered for hanging the beaded components.

Normally, I thread a jump ring into a bead or sew in a piece of chain while I am finishing the picot round. From what I can tell, it's a fairly standard finishing technique for beaded jewelry, but coming from the world of wire work - it looks like a potential weakness to me.

So, I decided to hang my brick stitch pendants using the technique I would normally use - a head pin. And it works! Isn't that cool?

I think it looks about the same, but my peace of mind is much higher.

The other thing I really like about the headpin is that it keeps the beads aligned over the center bead. That was something I really disliked in a design like the one above. In both components, the crystal is slightly off center due to the thread tension. Putting a headpin down the center keeps that from happening.

I also used my wire skills to make coordinating ear wires for these earrings. Not exactly Ases style - but I'm happy to be taking these components in a direction that uses all of my jewelry making skills.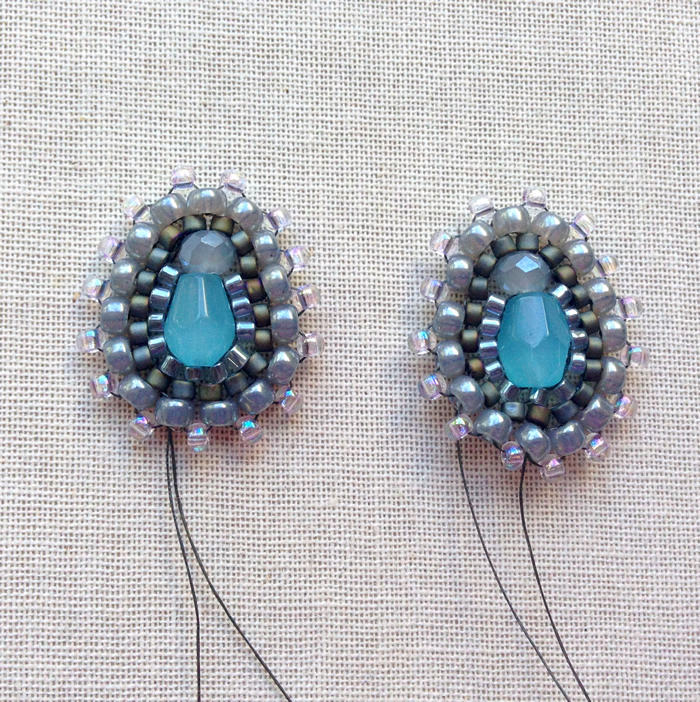
The other thing I really like about the headpin is that it keeps the beads aligned over the center bead. That was something I really disliked in a design like the one above. In both components, the crystal is slightly off center due to the thread tension. Putting a headpin down the center keeps that from happening.

Want to learn to make something similar - see this post on the basic brick stitch technique to get started.
File It On Facebook
Do you ever want to save one of my posts for future reference?
If you're on Facebook, you can like my page Lisa Yang Jewelry, and then share my posts either publicly or privately so they will post to your page. Then you can scroll through or search your timeline to find the project or tips you are interested in.
Subscribe for More Projects and Tips
By email: You can sign up by providing your email and you will be notified of new blog posts plus special offers. Make sure you confirm your subscription request by clicking the link in the email.
By following me on Pinterest: Lisa Yang Jewelry on Pinterest
By subscribing on YouTube: Lisa Yang Jewelry on YouTube
And Instagram: @lisayangjewelry
Comments
Post a Comment